アプリとサービスのすすめ

アプリやIT系のサービスを中心に書いていきます。たまに副業やビジネス関係の情報なども気ままにつづります

コーディング試験-思考力錬成用-応用問題 from Codility at 2021/01

Codility problems

2021/01月の記録です。

Codilityの難易度
「PAINLESS」<「RESPECTABLE」<「AMBITIOUS」
の順でむずくなってる

まずは分割統治法で簡単なの解いてみて、test=> 汎用的なコード書くこと
エラーはpythonでも、javaとかc++でもググって応用してみる。特にjavaは回答が充実してるのでjavaからの応用はおすすめ

f:id:trafalbad:20210128211805p:plain


Iteration:BinaryGap(PAINLESS)

my solution

def reset(ones, zeros):
    ones = 1
    zeros = 0
    return ones, zeros
    
def solution(N):
    binari = bin(N)[2:]
    ones, zeros = 0, 0
    lenth = []
    for i, val in enumerate(binari):
        if val==str(1):
            ones+=1
        else:
            zeros+=1          
        if ones==2:
            lenth.append(zeros)
            ones, zeros = reset(ones, zeros)
    return max(lenth) if lenth else 0


smart code solution

def solution(N):
    N = str(bin(N)[2:])
    count = False
    gap = 0
    max_gap = 0
    for i in N:
        if i == '1' and count==False:
            count = True
        if i == '0' and count == True:
            gap += 1
        if i == '1' and count == True:
            max_gap = max(max_gap, gap)
            gap = 0
    return max_gap

Array:CyclicRotation(PAINLESS)

My solution

def solution(A, K):
    n = len(A)
    for _ in range(K):
        last = A[-1]
        del A[-1]
        A=[last]+A
    return A


smart solution

def solution(A, K):
    # write your code in Python 2.7
    l = len(A)
    if l < 2:
        return A
    elif l == K:
        return A
    else:
        B = [0]*l
        for i in range(l):
            B[(i+K)%l] = A[i]
        return B

Time Complexity:TapeEquilibrium(PAINLESS)

My solution

def solution(A):
    diff = float('inf')
    for i in range(1, len(A)-1):
        s1 = sum(A[:i])
        s2 = sum(A[i:])
        diff = min(diff, abs(s1-s2))
    return diff


smart solution

def solution(A):
    total, minimum, left = sum(A), float('inf'), 0
    for a in A[:-1]:
        left += a
        minimum = min(abs(total - left - left), minimum)
    return minimum


Counting Elements:MaxCounters(RESPECTABLE)

My solution

def solution(N, A):
    arr = [0]*N
    maxim = max(A)
    for val in A:
        if val == maxim:
            arr = [max(arr)]*N
        else:
            arr[val-1]+=1
    return arr

smart solution

def solution2(N, A):
    counters = [0] * N
    for el in A:
        if el <= N:
            counters[el - 1] += 1
        else:
            counters = [max(counters)] * N
    return counters

CoderByte
CoderByte Challenge Libarary

f:id:trafalbad:20210130212935p:plain

Easy & Algorithm

Find Intersection

FindIntersection(strArr) read the array of strings stored in strArr which will contain 2 elements: the first element will represent a list of comma-separated numbers sorted in ascending order, the second element will represent a second list of comma-separated numbers (also sorted). Your goal is to return a comma-separated string containing the numbers that occur in elements of strArr in sorted order. If there is no intersection, return the string false.

Input: ["1, 3, 4, 7, 13", "1, 2, 4, 13, 15"] 
Output: 1,4,13
def FindIntersection(strArr):
    st1 = list(map(int, strArr[0].split(', ')))
    st2 = list(map(int, strArr[1].split(', ')))
    string = []
    for s in st1:
        if s in st2:
            string.append(str(s))
    return ','.join(string) if string else False

Codeland Username Validation

Have the function CodelandUsernameValidation(str) take the str parameter being passed and determine if the string is a valid username according to the following rules:

1. The username is between 4 and 25 characters.
2. It must start with a letter.
3. It can only contain letters, numbers, and the underscore character.
4. It cannot end with an underscore character.

If the username is valid then your program should return the string true, otherwise return the string false.

# sample1
input: "aa_" 
Output: false

#sample2
Input: "u__hello_world123" 
Output: true
def CodelandUsernameValidation(strParam):
    stack = []
    if len(strParam)<4 or len(strParam)>25:
        return 'false'
    if not strParam[0].isalpha() or strParam[-1]=='_':
        return 'false'
    for x in list(strParam):
        if x.isalpha() or x=='_' or x.isdigit():
            stack.append(x)
    return 'true' if stack else 'false'

Questions Marks

Have the function QuestionsMarks(str) take the str string parameter, which will contain single digit numbers, letters, and question marks, and check if there are exactly 3 question marks between every pair of two numbers that add up to 10. If so, then your program should return the string true, otherwise it should return the string false. If there aren't any two numbers that add up to 10 in the string, then your program should return false as well.

For example: if str is "arrb6???4xxbl5???eee5" then your program should return true because there are exactly 3 question marks between 6 and 4, and 3 question marks between 5 and 5 at the end of the string.

# sample1
Input: "aa6?9" 
Output: false

#sample2
Input: "acc?7??sss?3rr1??????5" 
Output: true
def QuestionsMarks(strParam):
  question = []
  total = 0
  for s in list(strParam):
    if s.isdigit() and len(question)<3:
      total += int(s)
    elif s.isdigit() and len(question)>3:
      total += int(s)
      if total==10:
        return 'true'
    elif s=='?':
       question.append(s)
  return 'false'


Longest Word

Have the function LongestWord(sen) take the sen parameter being passed and return the largest word in the string. If there are two or more words that are the same length, return the first word from the string with that length. Ignore punctuation and assume sen will not be empty.

# sample1
Input: "fun&!! time" 
Output: time

#sample2
Input: "I love dogs" 
Output: love
def LongestWord(sen):
    stack = {}
    string=''
    for s in list(sen):
        if s.isalpha():
            string +=s
        else:
            stack[string]=len(string)
            string=''
    stack[string]=len(string)
    return max(stack, key=stack.get)


First Factorial

Have the function FirstFactorial(num) take the num parameter being passed and return the factorial of it. For example: if num = 4, then your program should return (4 * 3 * 2 * 1) = 24. For the test cases, the range will be between 1 and 18 and the input will always be an integer.

# sample1
Input: 4 
Output: 24

#sample2
Input: 8 
Output: 40320
def FirstFactorial(num):
  factorial = 1
  for i in range(num, 0, -1):
    factorial *= i
  return factorial

Min Window Substring(Mediam)

#algorithm #Facebok

MinWindowSubstring(strArr) take the array of strings stored in strArr, which will contain only two strings, the first parameter being the string N and the second parameter being a string K of some characters, and your goal is to determine the smallest substring of N that contains all the characters in K. For example: if strArr is ["aaabaaddae", "aed"] then the smallest substring of N that contains the characters a, e, and d is "dae" located at the end of the string. So for this example your program should return the string dae.

Another example: if strArr is ["aabdccdbcacd", "aad"] then the smallest substring of N that contains all of the characters in K is "aabd" which is located at the beginning of the string. Both parameters will be strings ranging in length from 1 to 50 characters and all of K's characters will exist somewhere in the string N. Both strings will only contains lowercase alphabetic characters.

Input: ["ahffaksfajeeubsne", "jefaa"] 
Output: aksfaje
def MinWindowSubstring(strArr):
    N = list(strArr[0])
    K = list(strArr[1])
    Ks = list(strArr[1]).copy()
    string = ''
    for i, s in enumerate(N):
        if s in K:
            K.remove(s)
            string +=s
            if not K:
                break
        elif string:
            string +=s
    submit = ''
    for r in string[::-1]:
        if r in Ks:
            Ks.remove(r)
        submit += r
        if not Ks:
            return submit[::-1]

コーディング試験用基礎問 from Letcode

Letcode problems

f:id:trafalbad:20210127075001p:plain


1. Two Sum

# exactly one solution
Input: nums = [2,7,11,15], target = 9
Output: [0,1]
Output: Because nums[0] + nums[1] == 9, we return [0, 1].
class Solution:
    def twoSum(self, nums: List[int], target: int) -> List[int]:
        # stack = {}
        stack = []
        for idx, p in enumerate(nums):
            if p in stack:
                # idx2 = stack[p]
                idx2 = stack.index(p)
                return [idx2, idx]
            else:
                # stack[target-p]=idx
                stack.append(target-p)


7. Reverse Integer

Given a signed 32-bit integer x, return x with its digits reversed. If reversing x causes the value to go outside the signed 32-bit integer range [-231, 231 - 1], then return 0.

Assume the environment does not allow you to store 64-bit integers (signed or unsigned).

Input: x = 123
Output: 321

Input: x = 120
Output: 21
class Solution:
    def reverse(self, x: int) -> int:
        reverse_str = str(int(abs(x)))[::-1]
        submit = int(reverse_str)
        # must check first 
        if submit>= 2** 31 -1 or submit<= -2** 31:
            return 0
        elif x<0:
            return -submit
        else:
            return submit

9. Palindrome Number

Given an integer x, return true if x is palindrome integer.

An integer is a palindrome when it reads the same backward as forward. For example, 121 is palindrome while 123 is not.

Input: x = 121
Output: true

Input: x = -121
Output: false
class Solution:
    def isPalindrome(self, x: int) -> bool:
        return str(x)==str(x)[::-1]

13. Roman to Integer

Input: s = "MCMXCIV"
Output: 1994
Explanation: M = 1000, CM = 900, XC = 90 and IV = 4.
class Solution:
    def romanToInt(self, s: str) -> int:
        d = {'M': 1000,'D': 500 ,'C': 100,'L': 50,'X': 10,'V': 5,'I': 1}
        total = 0
        for i in range(0, len(s)-1):
            if d[s[i]]>=d[s[i+1]]:
                total += d[s[i]]
            else:
                total -= d[s[i]]
        # last facter dose not be included in above loop
        total += d[s[-1]]
        return total


20. Valid Parentheses

Given a string s containing just the characters '(', ')', '{', '}', '[', ']', determine if the input string is valid.
An input string is valid if:

・Open brackets must be closed by the same type of brackets.
・Open brackets must be closed in the correct order.

# sample1
Input: s = "{[]}"
Output: true

# sample2
Input: s = "()[]{}"
Output: true


# sample3
Input: s = "([)]"
Output: false
class Solution(object):
    def isValid(self, s):
        stack = []
        mapping = {")": "(", "}": "{", "]": "["}
        for char in s:
            if char in mapping.keys():
                # when else, stack is empty
                c = stack.pop() if stack else '#'
                if mapping[char] != c:
                    return False
            else:
                stack.append(char)
        # for cases like '['
        return not stack

26. Remove Duplicates from Sorted Array

Given a sorted array nums, remove the duplicates in-place such that each element appears only once and returns the new length.

Do not allocate extra space for another array, you must do this by modifying the input array in-place with O(1) extra memory.

# 訳:新しいlistを使わずに重複要素を削除して、listの長さをreturn しな
Input: nums = [0,0,1,1,1,2,2,3,3,4]
Output: 5, nums = [0,1,2,3,4]
Explanation: Your function should return length = 5, with the first five elements of nums being modified to 0, 1, 2, 3, and 4 respectively. It doesn't matter what values are set beyond the returned length.
class Solution:
    def removeDuplicates(self, nums: List[int]) -> int:
        i=0
        n = len(nums)
        for _ in range(n-1):
            if nums[i]==nums[i+1]:
                del nums[i]
            else:
                i +=1
        return len(nums)

35. Search Insert Position

Given a sorted array of distinct integers and a target value, return the index if the target is found. If not, return the index where it would be if it were inserted in order.

# sample1
Input: nums = [1,3,5,6], target = 5
Output: 2
# sample2
Input: nums = [1,3,5,6], target = 2
Output: 1
class Solution:
    def searchInsert(self, nums: List[int], target: int) -> int:
        for i,n in enumerate(nums):
            if nums[i] >= target:
                return i
            elif i == len(nums) - 1:
                return len(nums)

53. Maximum Subarray

Given an integer array nums, find the contiguous subarray (containing at least one number) which has the largest sum and return its sum.

Input: nums = [-2,1,-3,4,-1,2,1,-5,4]
Output: 6
Explanation: [4,-1,2,1] has the largest sum = 6.
class Solution:
    def maxSubArray(self, nums: List[int]) -> int:
        if not nums:
            return 0
       # curSum : save add subarray
       # maxSum :maximum add subarray in loop
        curSum = maxSum = nums[0]
        for num in nums[1:]:
            curSum = max(num, curSum + num)
            maxSum = max(maxSum, curSum)

        return maxSum

167. Two Sum II - Input array is sorted

Given an array nums of size n, return the majority element.

The majority element is the element that appears more than ⌊n / 2⌋ times. You may assume that the majority element always exists in the array.

# sample1
Input: nums = [3,2,3]
Output: 3
# sample2
Input: nums = [2,2,1,1,1,2,2]
Output: 2
class Solution:
    def majorityElement(self, nums: List[int]) -> int:
        d={}
        for val in nums:
            if val in d:
                d[val] +=1
            else:
                d[val] =1
        return max(d, key=d.get) # dictのvalueの最も大きいkeyをgetできる


171. Excel Sheet Column Number(解決法:ググリ力)

Given a column title as appear in an Excel sheet, return its corresponding column number.

For example:

A -> 1
    B -> 2
    C -> 3
    ...
    Z -> 26
    AA -> 27
    AB -> 28 
    ...
# sample1
Input: "A"   Output: 1
# sample 2
Input: "ZY"  Output: 701

解決法:「アルファベット 数字 python」でググった。

class Solution:
    def titleToNumber(self, alpha: str) -> int:
        num=0
        for index, item in enumerate(list(alpha)):
            num += pow(26,len(alpha)-index-1)*(ord(item)-ord('A')+1)
        return num 

コーディング試験用基礎問 from HackerRank

HackerRank Interview Preparation Kit

f:id:trafalbad:20210127054815j:plain


Type : Array

Arrays: Left Rotation

Explanation
When we perform left rotations, the array undergoes the following sequence of changes:

Sample Input

5 4
1 2 3 4 5

Sample Output

5 1 2 3 4


Solution

def rotLeft(a, d):
    return a[d:] + a[:d]

2D Array - DS

6×6のarrayのうちhourglassは下の位置要素で16こ存在する。

a b c
  d
e f g

maximum hourglass sumを求めよ
Solution

def hourglass_sums(arr):
    sums=[]
    for w in range(4):
        for h in range(4):
            hourglass = arr[h][w]+arr[h][w+1]+arr[h][w+2]+arr[h+1][w+1]+arr[h+2][w]+arr[h+2][w+1]+arr[h+2][w+2]
            sums.append(hourglass)
    return max(sums)


New Year Chaos


Sample Input

STDIN       Function
-----       --------
2           t = 2
5           n = 5
2 1 5 3 4   q = [2, 1, 5, 3, 4]
5           n = 5
2 5 1 3 4   q = [2, 5, 1, 3, 4]

Sample Output

3
Too chaotic

Solution

def minimumBribes(q):
    bribes = 0
    q = [i-1 for i in q]
    # reverse loop
    for i in range(len(q)-1,-1,-1):
        if q[i] - i > 2:
            print('Too chaotic')
            return
        # get specified value in loop
        for j in range(max(0, q[i] - 2),i):
            if q[j] > q[i]:
                bribes+=1
    print(bribes)

Type:Dictionaries and Hashmaps

Two Strings

Sample Input

2
hello
world
hi
world

sample output

YES
NO

Solution

def twoStrings(s1, s2):
    for s in s1:
        if s in s2:
            return 'YES'
    return 'NO'


Count Triplets

For example, sample input

len=5 ratio=5
1 5 5 25 125

Sample Output

4

The triplets satisfying are index (0, 1,3), (0,2,3), (1,3,4), (2,3,4)

Solution

from collections import Counter

def countTriplets(arr, r):
    r2 = Counter()
    r3 = Counter()
    count = 0
    for p in arr:
        if p in r3:
            count += r3[p]
        if p in r2:
            r3[p*r] += r2[p]
        r2[p*r] +=1
    return count

type:Sorting

Mark and Toys

Prices = [1, 2, 3,4 ]
k=7

The budget is 7 units of currency. He can buy items that cost [1, 2, 3]for 6, or [3, 4]for 7units. The maximum is 3 items.
Sample input

7 50
1 12 5 111 200 1000 10]

Sample outout

4

He can buy only 4 toys at most. These toys have the following prices: .[1, 12,5, 10]

Solution

def maximumToys(prices, k):
    total = 0
    count = 0
    prices = sorted(prices)
    for p in prices:
        if p+total <= k:
            total += p
            count += 1
        else:
            return count

Fraudulent Activity Notifications

Sample Input 1

lens=5 days lens=4
1 2 3 4 4


Sample Output

0

There are 4 days of data required so the first day a notice might go out is 5 day . Our trailing expenditures are [1,2,3,4] with a median of The client spends 4 which is less than 2✖️2.5(median of [1,2,3,4]) so no notification is sent.

Solution

import bisect as bs
def index(arr, x):
    return bs.bisect_left(arr, x)


def median(days, d):
    half = len(days)//2
    if d%2==0:
        med = (days[half]+days[half-1])/2
    else:
        med = days[half]
    return med

def activityNotifications(expenditure, d):
    notifications = 0
    days = sorted(expenditure[:d])
    for i in range(d, len(expenditure)-1): 
        med = median(days, d)
        if expenditure[i]>=med*2:
            notifications+=1
        del days[index(days, expenditure[i-d])]
        idx = bs.bisect_left(days, expenditure[i])
        days.insert(idx, expenditure[i])
    return notifications


Greedy Algorithms

Minimum Absolute Difference in an Array

Given an array of integers, find the minimum absolute difference between any two elements in the array.


Sample input

5
1 -3 71 68 17

Sample output

3

Explanation
The minimum absolute difference is |71-68|=3


Solution

def minimumAbsoluteDifference(arr):
    arr = sorted(arr)
    minabs = abs(arr[0] - arr[1])
    for i in range(0, len(arr)-1):
        if abs(arr[i] - arr[i+1])<minabs:
            minabs = abs(arr[i] - arr[i+1])
    return minabs

弟4回エッジAIコンペ(セグメンテーション) レポート・log【ハードウェア】

SIGNATEの第4回AIエッジコンペに参加したので、そのレポートもかねたログを書こうと思う。

機械学習だけじゃなくて、ハードウェアもガチのコンペでした。


目次
1.ネットワークについて
2.C++のアプリケーションコードの工夫について
3.ハードウェアプラットフォームについて


1.ネットワークについて

1.1 使ったmodelと戦略

ModelはカスタマイズしやすいUnetを使った。ライブラリはkerasとtensorflowで、量子化前の変換作業のために以下のversionを使用。

Keras==2.2.4
・tensorflow-gpu==1.13.1


Unetを選択したのはpretrainからfinetuneへのネットワークのカスタマイズとか、精度向上のためのカスタマイズがしやすかったから。

深さは512。処理速度が遅くならないようにモデル容量を少なめにしたので、メモリサイズは「14,067,237」。

このモデルでベンチマークを超える戦略をとった。

理由はこれでベンチマークを越えられれば、工夫・処理速度とかで、他の参加者とかなりの差別化になって、アドバンテージがとれると思ったから。

Yolov3とのモデルサイズの参考比較

Yolov3 62,002,753
Yolov3-tyny 8,861,918
今回のUnet 14,067,237


深さ512と1024の容量の比較

深さ  容量
512 14,067,237
1024 31,055,557

f:id:trafalbad:20201226171430p:plain
今回のUnetのネットワーク図


他には深さ1024(メモリサイズ:31,055,557)にpruningなどの軽量化テクを使う方法も考えた。

あと、今回のコンペは、セグメンテーションタスクや前処理とかで、ハードウェアのPS側の演算も多くなると考えたので、softmaxを最終層に使った。

このおかげでハードウェア側でsoftmax演算IPを使って、DPUの使用率を多くできた。


採用しなかったアプローチ


採用しなかったアプローチは1024以上の深さのmodelを作り、pruningやDistillation(蒸留)でmodelを軽量化するアプローチ。


このアプローチはpruningやDistilliationなどの技術がハードウェア特有の色が濃いため、習熟度・難易度の面で時間的・開発コストがかかりすぎる(独学だと時間的にきつい)。


軽量化しないと、深さ1024のmodelはメモリが30,000,000以上になって処理速度に如実に反映されるので、この戦略は使わなかった。


1.2 コンパイル時のエラー対策を考慮したネットワーク構成のポイント

量子化の直前・直後で精度劣化やエラーになるレイヤー構成が存在したので、それらを除外してネットワークを構築した。

改善した点


1.「Conv2D => BatchNormarization(BN) => relu 」の順番のレイヤー構成の厳守


NG構成は「relu=>BN」で、コンパイル時エラーになる

x = Conv2D(filters = n_filters, kernel_size = (kernel_size, kernel_size),
            kernel_initializer = 'he_normal', padding = 'same')(x)
x = BatchNormalization()(x)
x = Activation('relu')(x)


2. Decoder側にDropoutを使う


Decoder側(ConcatenateレイヤーやAddレイヤーを使う場所で)BNを使うと量子化後の精度劣化につながる。


3. softmaxの前にConv2Dを使わずに、Conv2DTransposeを使った


今回はsoftmaxを使ったので、量子化するためには、softmax前にConv2Dレイヤー以外(Conv2Dtranspose, separateconv2D とか)を使う必要があった。


1.3 DPUと連携を考えてsoftmaxを使った

今回はハードウェアで、softmax演算IPを使えるように、unetでも最終層にsoftmaxを使った。

softmaxを使ったおかげで次のポイントが利点になった。

・DPUの使用率を増やせる

・マルチスレッドで、PL, DPU演算, softmax演算の3つを並行処理できる

・sigmoidやreluよりsoftmaxの方が精度が高い


SoftmaxをUnetで使うための条件


vitisのDPUだと、SoftmaxをUnetで使う中で、試行錯誤の過程から以下のことが分かった。


コンパイル時の制約として、softmaxの直前のレイヤーはConv2D以外(Conv2Dtranspose, SeparateConv2Dなど)
を使う必要がある

# Finetune時のUnet(model)最終層付近のコード
x=model.get_layer(index=-5).output
x = Conv2DTranspose(nClasses, kernel_size=1, use_bias=False)(x)
x = (Activation("softmax"))(x)


・Conv2DTransposeでは「use_bias=False」を指定しないと、DNNDKライブラリの「dpuGetOutputTensorScale()」出力が変化して、sfotmax出力でエラーになることがある


1.4. 精度向上のために工夫したテクニック

深さ512でIou=60%を超えるためには単純にネットワークを構築するだけでは難しく、精度向上のためネットワークに頼る以外の工夫をした。
使った主なテクニックは下の通り。


オリジナル画像(HEIGHT, WIDTH)の比率をなるべく維持した画像サイズでのリサイズ、アスペクト比を維持してのresize


=> Shape=(400, 680)でresizeすることで元画像のサイズ比率をkeepした。また、opencvでresizeでアスペクト比を維持するようにresizeした。これで(224, 224)のように正方形でresizeするよりも小さい物体(signal, pedestrian)の予測精度が上がった。
多分位置情報がresizeでlostすることが減ったためと思う。


ヒストグラム平均化で暗い画像(画素平均80以下)を明るくする前処理


=> 暗い画像の細かい部分の精度向上に若干つながった。暗い画像は画素が偏る特徴があるため、
「画素平均が低い=暗い画像」
として画素平均80未満の画像にヒストグラム平均化を使って明るくした。

def clahe(bgr):
    #plt.imshow(bgr),plt.show()
    lab = cv2.cvtColor(bgr, cv2.COLOR_BGR2LAB)
    #plt.imshow(lab),plt.show()
    lab_planes = cv2.split(lab)
    clahe = cv2.createCLAHE(clipLimit=6.0,tileGridSize=(8,8))
    lab_planes[0] = clahe.apply(lab_planes[0])
    lab = cv2.merge(lab_planes)
    return cv2.cvtColor(lab, cv2.COLOR_LAB2BGR)


def NormalizeImageArr(path, H, W):
    NORM_FACTOR = 255
    img = cv2.imread(path, 1)
    img = cv2.resize(img, (H, W), interpolation=cv2.INTER_NEAREST)
    if img.mean()<80:
        img = clahe(img)
    img = img.astype(np.float32)
    img = img/NORM_FACTOR
    return img

augumatationでの学習


ノイズ系、contrast系、horizontal flipなど、位置を変化させずに済むaugumatationが一番効果があった。
車など上下反転することがない物体がある時はvertical flipは逆効果。

またaugumatationは一度にやらなくても少しずつ学習させた方が精度がだんだんと確実に上がっていくようだ。
以下の手順でaugumentationの学習をした。

Epoch データセット IOU Augmentation
100 CitySpacuies なし  なし
200 train:2143枚(コンペ用画像)、val:100枚(コンペ用画像) train=83.8%、Val = 74% なし
200 train:2143枚(flipした画像のみ)、val:100枚(flipした画像のみ) train=76%、Val = 68% Horizontal flip (validationにも適用)
100 train:4286枚、val:100枚 train=88.5%、Val = 75.8% Horizontal flip (valには適用なし)
100 train:4286枚、val:100枚 train=89.2%、Val = 77.5% contrast系(valには適用なし)


CitySpacesデータセットでpretrain


前回のコンペで前例があったので真似したら、精度がかなり上がった。


Residual構造やセグメンテーションに有利なサブレイヤーを追加するなどを試したが、深さ512だとモデルの表現力に限界があり、ほとんど効果がなかった。またMultiply演算を使うSENetなどもコンパイル時にエラーが出るなどの制約がある部分で精度向上ができなかったのがきつかった。

PDCAで学んだ点は何らかの精度向上のロジック・仮説がないまま闇雲に技術を駆使してもほとんどの工夫は無駄になるということ。


1.5.最後のネットワークのIouなどの結果

最終的にmodelサイズが「14,067,237」の状態でIou=61%(ほど)を達成した。


2.C++のアプリケーションコードの工夫について

処理速度やハードウェアの性能を引き出すためにC++で特に注力したポイントは2つ。


2.1 計算量の削減

今回はPS側の計算が多く、マルチスレッドを3つ使用したため、冗長なコードの削減・簡略化はかなり処理速度に効果がでた。
特に以下のような書き換えで、改善箇所1つにつき、30msほど速くなった。

・forループの効率化

・無駄な関数、その関数の無駄な呼び出しの削除

・決まった値の定数化


2.2. ハードウェアの性能を引き出すために、3つのマルチスレッド処理

今回は前処理やセグメンテーションでのforループなど、DPU演算以外のPS演算の使用率が多かっ たので、マルチスレッドを3つにすることで、30~50msほど早くなった。

下はDPUパラメータ(B1152, 「DSP48 USAGE=LOW」など)の時のマルチスレッド2つの時と3つの時の速度の違い

マルチスレッド個数  画像1枚の平均処理速度(ms)
2こ 1061
3こ 1007


3.3 PSとPL(DPU演算)のDPU演算とsoftmax演算の3つをマルチスレッドで並行処理してさらなる処理速度の向上


本来のマルチスレッドは「PS・PL」を並行処理することで処理速度を上げるのが目的だが、 今回はDNNDKライブラリを使用しているため、PLは

・DPU演算
・softmax演算


で使うメソッドが独立している。

DPU演算メソッド dpuRunTask()
softmax演算メソッド dpuRunSoftmax()

このため今回は

・PS演算
・DPU演算
・softmax演算


の3つをマルチスレッドの並行処理の対象とした。DPU演算とsoftmax演算の両方に非同期処理std::lock_guard lock(mtx_)を用いることで、

DPU演算とsoftmax演算を並行ことができ、マルチスレッドでさらなる処理速度向上が可能になった。


PS・DPU演算(PL)・spftmax演算(PL)の3つを並行処理したマルチスレッド用関数 (main_thread())の抜粋(重要箇所のみ)

#include <thread> 
#include <opencv2/opencv.hpp>
#include <opencv2/core.hpp>
#include <dnndk/dnndk.h>
#include <mutex>  
std::mutex mtx_;
〜〜
〜〜

int main_thread(DPUKernel *kernelConv, int s_num, int e_num, int tid){
  assert(kernelConv);
  DPUTask *task = dpuCreateTask(kernelConv, DPU_MODE_NORMAL); 
  〜〜〜
  // Main Loop
  int cnt=0;
  for(cnt=s_num; cnt<=e_num; cnt+=BLOCK_SIZE){
      for(int i=0; i<BLOCK_SIZE;i++){
        if(cnt+i>e_num) break;
        Mat img;
        resize(input_image[i], img, for_resize, INTER_NEAREST);
        // pre-process with histgram avaraving
        Mat clahe_img = img;
        if((int)mean(img)[0] < 80) {
           clahe_img = clahe_preprocess(img);	
        }
    
        float *softmax = new float[outWidth*outHeight*outChannel]
        // Set image into Conv Task with mean value
        set_input_image(task, outWidth, clahe_img);
        {
          std::lock_guard<std::mutex> lock(mtx_);
          dpuRunTask(task);
        }
        {
          std::lock_guard<std::mutex> lock(mtx_);
          //cout << "outScale : " << outScale << endl;
          int8_t *outAddr = (int8_t *)dpuGetOutputTensorAddress(task, CONV_OUTPUT_NODE);
          dpuRunSoftmax(outAddr, softmax, outChannel,outSize/outChannel, outScale);
        }

        // Post process
        PostProc(softmax, outHeight, outWidth, outChannel, image_file_name[i].c_str());
        delete[] softmax;
      }
  }
  dpuDestroyTask(task);
   return 0;
}

f:id:trafalbad:20201221122329p:plain
3マルチスレッドでPS・DPU演算・softmax演算を並行処理


3.ハードウェアプラットフォームについて

3.1 開発環境

QiitaのVitis-AI開発環境のサイトを参考にした。Vitis-AI-Runtimeライブラリは使わなかったので、DNNDKライブラリベースで開発をした。


3.2 DPUのハードウェアプラットフォーム構築上の工夫について

Vitis-AI環境設定のチュートリアルと第2回のエッジAIコンペの資料(以下:参考資料)を主に参考に、チュートリアルのプラットフォームに改善を加え構築した。


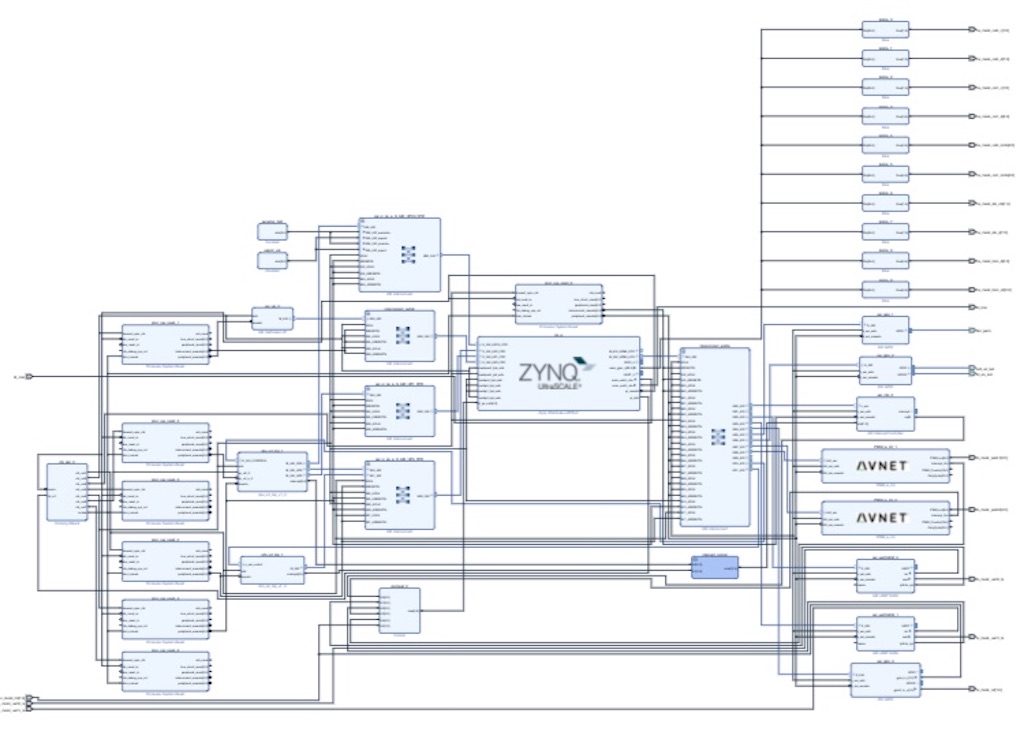
3.2.1 softmax演算IPの活用


なるべくDPU演算を活用するためにsfotmax演算IPを活用。

UnetでConv2DTrasposeを使い、modelとの連携を考慮して、softmax演算を使った。


f:id:trafalbad:20201218012335j:plain
Softmax演算を含んだプラットフォーム(不要なIP削除ずみ)


3.2.2 プラットフォームの構築・改良


DNNDKベースでの開発のため、参考資料をヒントに、Visits-AIプラットフォームのチュートリアルをメインに改良した。
はじめはDPUを搭載したプラットフォームを参考資料の
・softmaxと連携したB1600のDPUの搭載

・DPUの周波数250MHz

の条件で動くことをはじめの目標にした。


そのためにまずチュートリアルのプラットフォームに

1.不要なIPの削除

2.不要なクロックの削除

をして、WNS=0.027でプラットフォームを構築。

今回はmodelの使用のためには「DepthwiseConv」をEnableにする必要性からパラメータと周波数に変更を加えた。


3.3 DPUパラメータと周波数

今回はDPUパラメータの「DepthwiseConv」をEnableにする必要があったため、パラメータがデカすぎて周波数が大きいとリブートしてしまうので、B1600で250MHzでのDPUパラメータでの搭載は出来なかった。

「DepthwiseConv」はB1600で「3292」のLUTを使用することから、DPUパラメータのリソースを参考資料よりかなり減らす必要があった。

特に今回のmodelではconvolution層を多用するため、
「Channel Augumetation」をEnableにしないと、「DSP48 Usage」をHighの時でもかなり処理速度が低下するため、

・「Channel Augmentaion」をEnable

・「DepthWiseConv」をEnable


を必須条件にした。
結果的に、周波数225MHz以上で「DSP48 USAGE」をHIGHにした状態だとリブートしてしまったので、最終的に周波数200MHz、かつ以下のパラメータでDPUを搭載した。

周波数 200MHz
DPU B1600(ReLU+ReLU6)
Channel Augmentation Enable
DepthWiseConv Enable
PoolAverage Disnable
DSP48 USAGE HIGH
RAM USAGE LOW
Softmax Enable

リソースの関係上これ以上の周波数向上はできなかった。


3.4 implとsynthストラテジで処理速度の向上

今回のDPUパラメータに周波数200MHzでは、DPUの性能を引き出すには周波数が足りないので、ストラテジの組み合わせで処理速度が向上できないか、fixstarsのサイトを参考にいくつか試した。


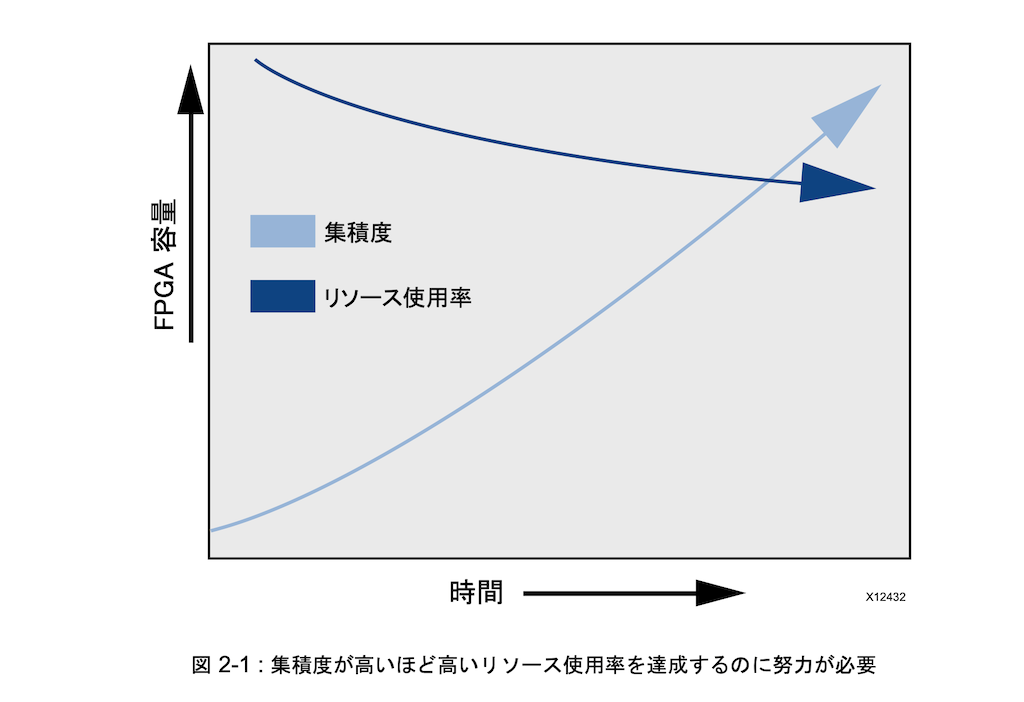
高集積度FPGA設計ガイド」によるとリソースが多いほど集積度を低くしないと、リソースの使用度が難しくなるらしい。

f:id:trafalbad:20201214164645p:plain

今回はDPUのリソースが多かったため、集積度が低くなるように、分散させる系の以下のストラテジの組み合わせを選択したことで35msほど早くなった。

impl Congestion_SpreadLogic_high
Synth Flow_AreaOptimized_high
WNS 0.131 ns

SSIに分散するストラテジ「impl : Congestion_SSI_SpreadLogic_low」も試したが、SSIは消費電力は低いものの、集積度が高いので、上の組み合わせの方が処理性能は高かった。


このストラテジーの組み合わせ、B1600、周波数200MHZなどで制約を満たしたDPUを搭載した。
f:id:trafalbad:20201219013200p:plain

PSと比較してDPUとsoftmaxの使用率は以下の通りになった。

PS & PL Tototal 93%
DPU 43%
Softmax 6%


f:id:trafalbad:20201219013211p:plain

今回の消費電力レポート


f:id:trafalbad:20201227080507j:plain

参考資料


vitis-AI platform site(qiita)

DPU-TRD

Xilinx GitHub Vitis-AI-TUTORIAL

Vivado の合成/インプリメンテーションストラテジを変えてみる(WNS・走行時間編)

第2回AIエッジコンペ資料

Zynq DPU v3.2ガイド

高集積度 FPGA 設計手法 ガイド

Vitis-AIを使ってultra96v2上で学習済みモデルを動かすまで【hardware, FPGA, AI】

今回はultra96v2上で学習済みモデルを動かしてみる。

この作業がすんなりできれば、論理回路の高位合成とか組み込み部分を除けば、学習済みモデルを作れればドローン制御、自動運転の制御とかいろんなことの礎になる。

本家サイト「Ultra96V2向けVitis AI(2019.2)の組み立て方」通りに進めたけど情報が古かったのでかなり苦労した。


f:id:trafalbad:20200429092854p:plain


目次
1.動作環境「vitis AI」の構築
2.Deep Learning Processor Unit (DPU) IP の作成
3.学習済みデータと画像の用意
4.pbファイルの量子化(quantization)
5.量子化したファイルからFPGA用アプリケーションの作成
6.Ultra96v2ボードでの動作確認


1.動作環境「vitis AI」の構築

dockerのインストール


dockerが必要なのでdockerをインストール。

$ sudo apt-get update && sudo apt-get upgrade
$ sudo apt install -y apt-transport-https ca-certificates curl software-properties-common
$ curl -fsSL https://download.docker.com/linux/ubuntu/gpg | sudo apt-key add -
>>>
OK

$ sudo add-apt-repository "deb [arch=amd64] https://download.docker.com/linux/ubuntu $(lsb_release -cs) stable"
# Uninstall Old Versions of Docker & Install Docker
$ sudo apt-get remove docker docker-engine docker.io && sudo apt install docker.io
# Start and Automate Docker
$ sudo systemctl start docker && sudo systemctl enable docker
# コンテナ確認
$ sudo docker ps
>>>
CONTAINER ID        IMAGE               COMMAND   CREATED             STATUS              PORTS     NAMES


sudo なしで実行できるようにする。

# dockerグループ作成 & 現行ユーザをdockerグループに所属させる
$ sudo groupadd docker && sudo gpasswd -a $USER docker
# dockerデーモンを再起動する (CentOS7の場合)
$ sudo systemctl restart docker
# exitして再ログインすると反映される。
$ sudo reboot
# コンテナ確認
$ docker ps
>>>
CONTAINER ID        IMAGE               COMMAND   CREATED             STATUS              PORTS     NAMES

参考:Ubuntu 18.04にDockerをインストールする(+docker-composeも)


vitis-Aiのインストール


「tesnsorflow_q_val」コマンドがvirtualbocxだとCPUの関係で使えないので、EC2インスタンスで作業した。

次にvitis AIのインストール。
XilinxのVitis-AIがupgradeされてた。ブランチのv1.1をgit clone。

$ git clone -b v1.1 https://github.com/Xilinx/Vitis-AI
# Dockerの設定
$ cd Vitis-AI/docker
$ ./docker_build_cpu.sh
$ cd Vitis-AI
$ ./docker_run.sh xilinx/vitis-ai-cpu:latest


今回はCPU環境で試してみて、動いた!
f:id:trafalbad:20200429092932p:plain

# 抜ける
$ exit
# GPUの時はこちら
$ sudo ./docker_build_gpu.sh
$ sudo ./docker_run.sh xilinx/vitis-ai-gpu:latest


BitStreamのためにメモリの増設


VirtualBoxで作業してるので、DPUは死ぬほどメモリを食うので


プロセッサーでCPUを6枚

・メインメモリを11800くらいに変更

して計算リソースを増やした。

f:id:trafalbad:20200808225619p:plain

f:id:trafalbad:20200808225623p:plain


計算リソースが足りないとBitStream時に「強制終了エラー」が出る。


2.Deep Learning Processor Unit (DPU) IP の作成

DPU IPは「DPU for Convolutional Neural Network v1.1」によるとFPGAでCNNとかを動かすリソース(レジスタ設定、データ コントローラー、たたみ込み演算の各モジュールとか)が組み込まれてる。

DPU IPはvivadoで作成しなきゃならないけど、ここは本家サイトからresnet50用のDPUをdownloadした。


DPU(AI)IP作成パート
f:id:trafalbad:20200429092954p:plain

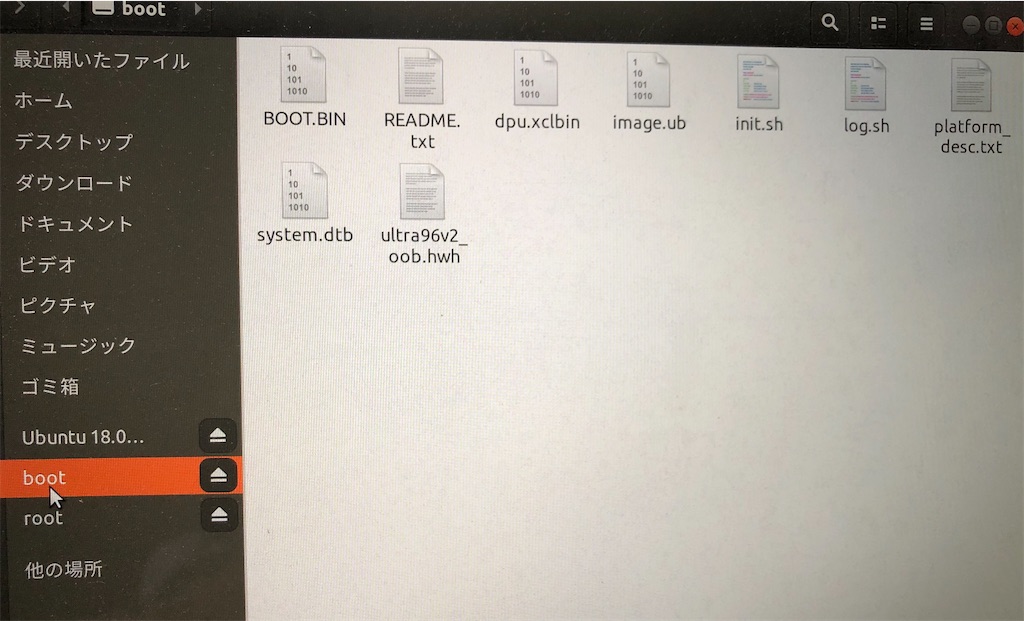
download後にultra96v2ボードにetcherでコピー。


コピー後のボード内ファイル一覧

$ ls ultra96_oob
BOOT.BIN        image.ub        system.dtb
README.txt        init.sh            ultra96v2_oob.hwh
dpu.xclbin        platform_desc.tx

これはSDCARDのboot領域(/media/user/${SDCARD}/boot)にコピーされる


3.学習済みネットワークと画像の用意

学習済みネットワークと画像の用意のパート
f:id:trafalbad:20200429093029p:plain


1.学習済みネットワークを用意


まず、作業環境のDocker起動(これ以降はほとんどdocker上で動かす)

$ cd Vitis-AI
$ sudo ./docker_run.sh xilinx/vitis-ai-cpu:latest
# 作業ディレクトリ作成
$ mkdir workspace
$ cd workspace


“vitis-ai-tensorflow”(または”vitis-ai-caffe”)をcondaで実行。

$ conda activate vitis-ai-caffe
# tensorflowの場合
$ conda activate vitis-ai-tensorflow


今回はtensorflowのunetを自分で学習して、kerasの重みファイル(hdf5, ckptファイル)からultra96v2で動くアプリケーションを作る。


2.評価用画像の用意


評価用として学習用に使った画像をprepare_dataset.pyで100枚用意した。

量子化に使う「graph_input_fn.py」を少し書き換えた。

graph_input_fn.py

calib_batch_size = 10

def calib_input(iter):
  images = []
  line = open(calib_image_list).readlines()
  #print(line)
  for index in range(0, calib_batch_size):
      curline = line[iter*calib_batch_size + index]
      #print("iter= ", iter, "index= ", index, "sum= ", int(iter*calib_batch_size + index), "curline= ", curline)
      calib_image_name = curline.strip()

      image_path = os.path.join(calib_image_dir, calib_image_name)
      image2 = NormalizeImageArr(image_path)

      #image2 = image2.reshape((image2.shape[0], image2.shape[1], 3))
      images.append(image2)

  return {"input_1": images}


def main():
  calib_input()

if __name__ == "__main__":
    main()


4.pbファイルの量子化(quantization)


kerasの訓練済の重みファイルを変換して、freezeしたpbファイル(frozen_graph.pb)を量子化する。

quantize.shで量子化

#!/bin/sh
FREEZE_DIR=freeze_tfpb
FROZEN_GRAPH_FILENAME=frozen_graph.pb
QUANT_DIR=quantized_model
INPUT_NODE="input_1"
Q_OUTPUT_NODE="conv2d_23/Sigmoid" # output node of quantized CNN

vai_q_tensorflow quantize \
	 --input_frozen_graph  ${FREEZE_DIR}/${FROZEN_GRAPH_FILENAME} \
	 --input_nodes         ${INPUT_NODE} \
	 --input_shapes        ?,224,224,3 \
	 --output_nodes        ${Q_OUTPUT_NODE} \
	 --output_dir          ${QUANT_DIR}/ \
	 --method              1 \
	 --input_fn            graph_input_fn.calib_input \
	 --calib_iter          10 \
	 --gpu 0


4.量子化データから、FPGA用アプリケーションの作成

アプリケーション作成のパートf:id:trafalbad:20200429093057p:plain


1.dcfファイルの作成


次に、etcherでイメージをSDカードにコピーしたときできた、”ultra96v2_oob.hwh”のhwhファイル(ハードウェア情報ファイル)を使って、dcfファイルを作る。

$ dlet -f ultra96v2_oob.hwh
>>>
[DLet]Generate DPU DCF file dpu-11-18-2019-18-45.dcf successfully.
# rename
$ mv dpu-11-18-2019-18-45.dcf resnet50.dcf

dletコマンドは“vitis-ai-caffe”(“vitis-ai-tensorflow”)内でのみ使える。
dcfファイルは後で使う。


2.compileを実行


compile.sh

#! /bin/sh
CNN=unet
COMPILE_DIR=output_compile
QUANT_DIR=quantized_model
TARGET=custom
ARCH=${TARGET}.json
vai_c_tensorflow \
 	 --frozen_pb ${QUANT_DIR}/deploy_model.pb \
 	 --arch ${ARCH} \
 	 --output_dir ${COMPILE_DIR}/${CNN}2 \
	 --options    "{'mode':'normal'}" \
	 --net_name ${CNN}2

dcfを入れたcustom.jsonの中身。

$cat custom.json
>>>
{"target": "dpuv2", "dcf": "dpu-11-18-2019-18-45.dcf", "cpu_arch": "arm64"}


compileを実行。

$ ./compile.sh
>>>>

**************************************************
* VITIS_AI Compilation - Xilinx Inc.
**************************************************
[VAI_C][Warning] layer [conv2d_23_Sigmoid] (type: Sigmoid) is not supported in DPU, deploy it in CPU instead.

Kernel topology "unet2_kernel_graph.jpg" for network "unet2"
kernel list info for network "unet2"
                               Kernel ID : Name
                                       0 : unet2_0
                                       1 : unet2_1

                             Kernel Name : unet2_0
--------------------------------------------------------------------------------
                             Kernel Type : DPUKernel
                               Code Size : 1.16MB
                              Param Size : 29.63MB
                           Workload MACs : 83685.54MOPS
                         IO Memory Space : 17.04MB
                              Mean Value : 0, 0, 0, 
                      Total Tensor Count : 40
                Boundary Input Tensor(s)   (H*W*C)
                            input_1:0(0) : 224*224*3

               Boundary Output Tensor(s)   (H*W*C)
              conv2d_23_convolution:0(0) : 224*224*11

                        Total Node Count : 35
                           Input Node(s)   (H*W*C)
                 conv2d_1_convolution(0) : 224*224*3

                          Output Node(s)   (H*W*C)
                conv2d_23_convolution(0) : 224*224*11

                             Kernel Name : unet2_1
--------------------------------------------------------------------------------
                             Kernel Type : CPUKernel
                Boundary Input Tensor(s)   (H*W*C)
                  conv2d_23_Sigmoid:0(0) : 224*224*11

               Boundary Output Tensor(s)   (H*W*C)
                  conv2d_23_Sigmoid:0(0) : 224*224*11

                           Input Node(s)   (H*W*C)
                       conv2d_23_Sigmoid : 224*224*11

                          Output Node(s)   (H*W*C)
                       conv2d_23_Sigmoid : 224*224*11

終わったあとのファルダ構造。

$ tree 
>>>
compile
├── compile.sh
├── custom.json
├── dpu-11-18-2019-18-45.dcf
├── output_compile
│   └── unet2
│       └── unet2_kernel_graph.gv
|        └── dpu_unet2_0.elf
├── quantized_model
│   ├── deploy_model.pb
│   └── quantize_eval_model.pb
└── ultra96v2_oob.hwh


3.アプリケーションの作成(sigmoidを使う


まずdocker。Xilinx提供のVitis AI runtimeを実行。

$ ./docker_run.sh xilinx/vitis-ai:runtime-1.0.0-cpu

今回unetにsigmoidを使った。

sigmoidはDPUで対応してないため、DPUKernelとCPUKernelが分割されるので、dpu_unet2_0.elf(unet2_0)が作成される。


なのでアプリケーション作成時に使う
「src/fpc_main.cc」のコードで

#define KERNEL_CONV   "unet2"

から

#define KERNEL_CONV       "unet2_0"

に置き換えないとultra96v2上で動かない。


5.量子化したファイルからFPGA用アプリケーションの作成


1.開発環境構築・ライブラリをSDカードへコピー


Vitis AIをUltra96上で動かすには、xilinxのライブラリーが必要なので、runtime パッケージをSDカード(rootのsdcardフォルダ)にコピー

# パッケージのinstall(開発環境構築)
$ sudo cp -r /opt/vitis_ai/xilinx_vai_board_package Vitis-AI/workspace/
$ cd Vitis-AI/workspace/xilinx_vai_board_package/
$ sudo ./install.sh

# パッケージをSDカードにコピー
$ sudo cp -r /opt/vitis_ai/xilinx_vai_board_package /media/user/${SDCARD}/root/home/root/


2.FPGA用アプリケーションの作成


さっき作った「dpu_unet2_0.elf」をのmodelファルダの中に移動。
「$make」コマンドでアプリケーション作成実行。

コードはXilinxsegmentationチュートリアルのコードを少し改造して使った。

# アプリケーションの作成実行
$ sudo make 


アプリケーション完成後のディレクトリ構造

$ tree 
>>>
├── common
│   ├── dputils.cpp
│   ├── dputils.h
│   └── dputils.py
└── unet2
    ├── Makefile
    ├── build
    │   ├── dputils.o
    │   └── fps_main.o
    ├── model
    │   ├── dpu_unet2_0.elf
    │   └── libdpumodelunet2.so
    ├── src
    │   └── fps_main.cc
    └── unet2

src/fps_main.ccの一部を変更。

// constants for segmentation network
#define KERNEL_CONV       "unet2_0"
#define CONV_INPUT_NODE   "conv2d_1_convolution"
#define CONV_OUTPUT_NODE  "conv2d_23_convolution"


アプリケーションとして「unet2」と「libdpumodelunet2.so」ができるので、それをSDカード(rootのsdcardフォルダ)にコピー。

$ cp resnet50 /media/user/${SDCARD}/root/home/root/


6.Ultra96v2ボードでの動作確認

いつもみたいにultra96v2の実機を起動後に、gtktermで接続してログイン

$ gtkterm -p /dev/ttyUSB1 -s 115200
# ライブラリのinstall
$ cd xilinx_vai_board_package
$ ./install.sh
>>>
Begin to install Xilinx DNNDK ...
Requirement already satisfied: Edge-Vitis-AI==1.0 from file:///sdcard/pkgs/python/Edge_Vitis_AI-1.0-py2.py3-none-any.whl in /usr/lib/python3.5/site-packages (1.0)
Complete installation successfully.

判別用画像をroot/home/rootの「worksapace/dataset1/」の中に入れておく。

$ cd unet2/
$ sudo chmod 755 *
$ ./unet2

f:id:trafalbad:20200902200235p:plain


中身は適当なので出力結果は気にしないけど、とりあえず動いた。


ここでこの部分の作業が終わって、AIを動かす過程が一通り終了。
f:id:trafalbad:20200429093241p:plain


ここまででようやくultra96v2上で学習済みモデルを動かせた。

f:id:trafalbad:20200429094131j:plain


参考サイト


Ultra96V2向けVitis AI(2019.2)の組み立て方

Ubuntu 18.04にDockerをインストールする(+docker-composeも)

Vitis AI User Guide

ザイリンクス社「Vitis AI開発環境」を評価キット ZCU102 で動かしてみた

GitHub - Xilinx/Vitis-AI at v1.1

Vitis-AI 1.1 Flow for Avnet VITIS Platforms - Part 1

UbuntuでSDカードのEXT4とFAT32のパーテションの作り方

ubuntuでSDカードのパーティション作成のメモ

目次
1.ubuntumacにインストールする
2. ubuntuを起動、SDカードの確認
3.パーティションの作成
4.GUIでパーテイションの内訳を確認してみる
追記.Ffrom CUI


1.ubuntumacにインストールする

1.USBカードを差し込む。

$ diskutil list
$ diskutil unMountDisk /dev/disk2 (USB= /dev/disk2)
$ sudo dd if=ubuntu-18.4.2.iso of=/dev/disk2 bs=1m

終わったら、「無視」をクリック。


2.macをoption押しながら起動してUSBの選択肢を選択する。


3.あとは[ubuntu〜 install]をクリックしてwifi設定も含めてubuntuをinstall
ほとんどvirtualBoxと同じ方法でinstall。


2. ubuntuを起動、SDカードの確認

macの「diskutil list」と同じコマンドを打って、SDカードの内訳確認

$ dmesg | tail
>>>>
...
[ 6854.215650] sd 7:0:0:0: [sdc] Mode Sense: 0b 00 00 08
[ 6854.215653] sd 7:0:0:0: [sdc] Assuming drive cache: write through
[ 6854.215659]  sdc: sdc1


この例では/dev/sdcとして認識されてる。


3.パーティションの作成

fdiskコマンドの確認
・p:確認
・d:パーティション削除
・n:パーティション新規作成
・a:起動フラグの有効化

$ sudo fdisk /dev/sdc

fdisk (util-linux 2.31.1) へようこそ。
ここで設定した内容は、書き込みコマンドを実行するまでメモリのみに保持されます。
書き込みコマンドを使用する際は、注意して実行してください。


・pコマンドで確認

コマンド (m でヘルプ): p
ディスク /dev/sdc: 14.9 GiB, 16022241280 バイト, 31293440 セクタ
単位: セクタ (1 * 512 = 512 バイト)
セクタサイズ (論理 / 物理): 512 バイト / 512 バイト
I/O サイズ (最小 / 推奨): 512 バイト / 512 バイト
ディスクラベルのタイプ: dos
ディスク識別子: 0xf20f0c70

デバイス   起動 開始位置 最後から   セクタ サイズ Id タイプ
/dev/sdc1           2048  2936831  2934784   1.4G  c W95 FAT32 (LBA)
/dev/sdc2        2936832 14680063 11743232   5.6G 83 Linux


・dコマンドでパーティション削除

コマンド (m でヘルプ): d
パーティション番号 (1,2, 既定値 2): 2

パーティション 2 を削除しました。

コマンド (m でヘルプ): d
パーティション 1 を選択
パーティション 1 を削除しました。


・pで確認

コマンド (m でヘルプ): p
ディスク /dev/sdc: 14.9 GiB, 16022241280 バイト, 31293440 セクタ
単位: セクタ (1 * 512 = 512 バイト)
セクタサイズ (論理 / 物理): 512 バイト / 512 バイト
I/O サイズ (最小 / 推奨): 512 バイト / 512 バイト
ディスクラベルのタイプ: dos
ディスク識別子: 0xf20f0c70


・nで新規作成(n => p => 1 => 2048)

コマンド (m でヘルプ): n
パーティションタイプ
   p   基本パーティション (0 プライマリ, 0 拡張, 4 空き)
   e   拡張領域 (論理パーティションが入ります)
選択 (既定値 p): p
パーティション番号 (1-4, 既定値 1): 1
最初のセクタ (2048-31293439, 既定値 2048): 2048
最終セクタ, +セクタ番号 または +サイズ{K,M,G,T,P} (2048-31293439, 既定値 31293439): 2936831

新しいパーティション 1 をタイプ Linux、サイズ 1.4 GiB で作成しました。
パーティション #1 には vfat 署名が書き込まれています。

署名を削除しますか? [Y]es/[N]o: Yes

署名は write (書き込み)コマンドを実行すると消えてしまいます。


・aで起動フラグを有効にする

コマンド (m でヘルプ): a
パーティション 1 を選択
パーティション 1 の起動フラグを有効にしました。


・pで確認

コマンド (m でヘルプ): p
ディスク /dev/sdc: 14.9 GiB, 16022241280 バイト, 31293440 セクタ
単位: セクタ (1 * 512 = 512 バイト)
セクタサイズ (論理 / 物理): 512 バイト / 512 バイト
I/O サイズ (最小 / 推奨): 512 バイト / 512 バイト
ディスクラベルのタイプ: dos
ディスク識別子: 0xf20f0c70

デバイス   起動 開始位置 最後から  セクタ サイズ Id タイプ
/dev/sdc1  *        2048  2936831 2934784   1.4G 83 Linux

パーティション 1 にあるファイルシステム/RAIDの署名が完全に消去されます。


・nで2個めのパーティション作成(n => p => 2 => 2936832 => 31293439)

コマンド (m でヘルプ): n
パーティションタイプ
   p   基本パーティション (1 プライマリ, 0 拡張, 3 空き)
   e   拡張領域 (論理パーティションが入ります)
選択 (既定値 p): p
パーティション番号 (2-4, 既定値 2): 2
最初のセクタ (2936832-31293439, 既定値 2936832): 2936832
最終セクタ, +セクタ番号 または +サイズ{K,M,G,T,P} (2936832-31293439, 既定値 31293439): 31293439

新しいパーティション 2 をタイプ Linux、サイズ 13.5 GiB で作成しました。
パーティション #2 には ext4 署名が書き込まれています。

署名を削除しますか? [Y]es/[N]o: Yes

署名は write (書き込み)コマンドを実行すると消えてしまいます。


・pで最終確認 & 終了

コマンド (m でヘルプ): p
ディスク /dev/sdc: 14.9 GiB, 16022241280 バイト, 31293440 セクタ
単位: セクタ (1 * 512 = 512 バイト)
セクタサイズ (論理 / 物理): 512 バイト / 512 バイト
I/O サイズ (最小 / 推奨): 512 バイト / 512 バイト
ディスクラベルのタイプ: dos
ディスク識別子: 0xf20f0c70

デバイス   起動 開始位置 最後から   セクタ サイズ Id タイプ
/dev/sdc1  *        2048  2936831  2934784   1.4G 83 Linux
/dev/sdc2        2936832 31293439 28356608  13.5G 83 Linux

パーティション 1 にあるファイルシステム/RAIDの署名が完全に消去されます。
パーティション 2 にあるファイルシステム/RAIDの署名が完全に消去されます。

コマンド (m でヘルプ): ^C
終了してよろしいですか? y


4.GUIパーティションの内訳を確認してみる

deskopから、「desk」を選択。

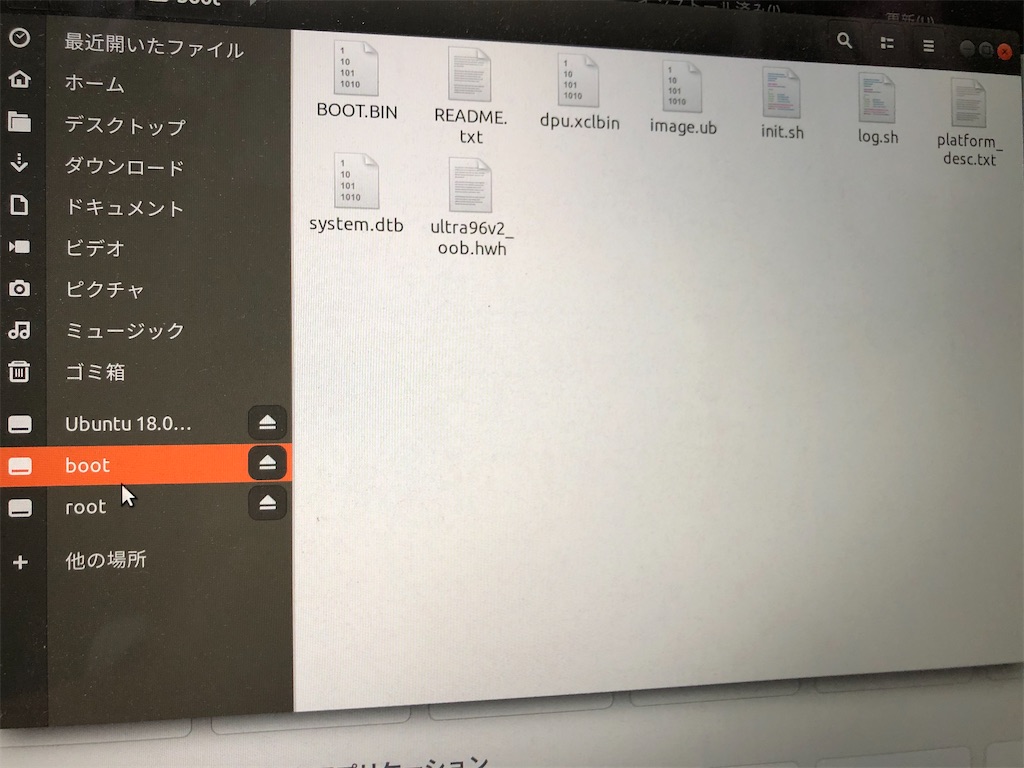
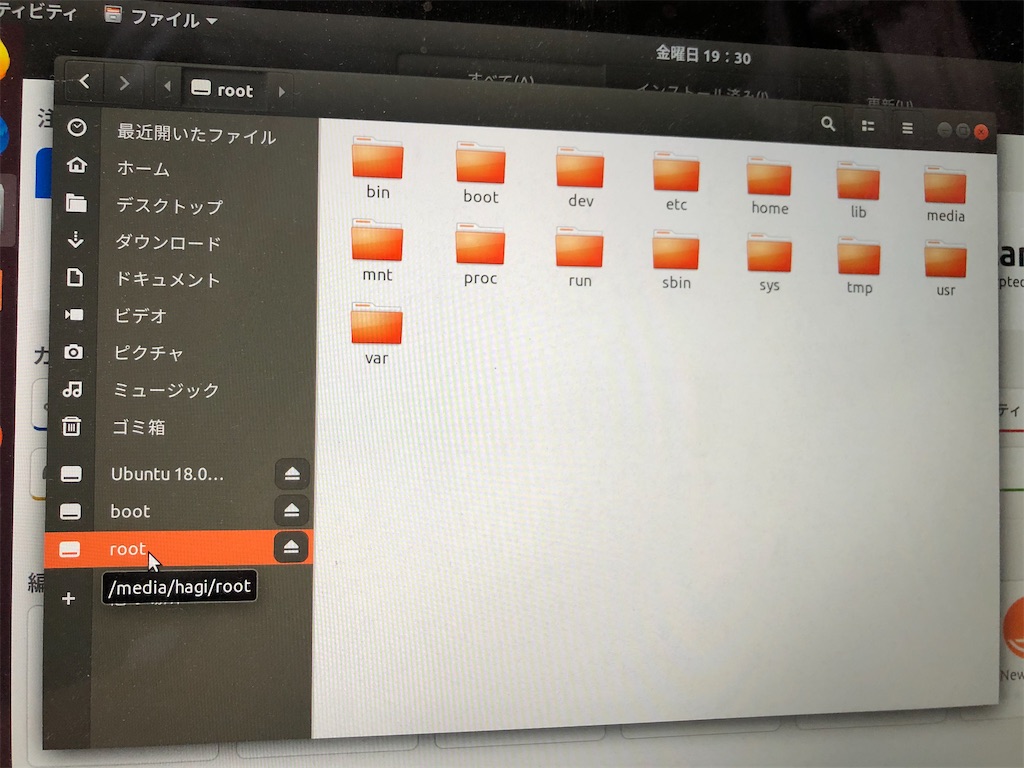
SDカードを差し込むと「boot」と「root」の両方があるのが見える。
f:id:trafalbad:20200703212618j:plain

FAT32パーティション(boot)f:id:trafalbad:20200703212646j:plain


EXT4(linux用)パーティション(root)f:id:trafalbad:20200703212652j:plain


FAT32パーティション(boot)の中身f:id:trafalbad:20200703212700j:plain


EXT4パーティション(root)の中身f:id:trafalbad:20200703212708j:plain


sdカードをFAT32EXT4に分割できた。

ちなみにmacでは無理で、ubuntuをOSで入れないとできない


追記.From CUI

1.HDDを仮想環境に追加


設定=>ストレージ=>「コントロール:SOTA」の右のプラスボタンをクリックで作成。
・VDI(Virtual Disk Image)

・可変サイズ

・とりあえず50GB
で作成。

f:id:trafalbad:20200929020441p:plain

50GBのHDDが追加されたか確認。

$ dmesg | grep sdb
>>>
[    3.462702] sd 3:0:0:0: [sdb] 104857600 512-byte logical blocks: (53.7 GB/50.0 GiB)


2イメージの書き込み


fdiskじゃなくてpartedコマンドで作る

このサイトからinstallしたイメージをEtcherでSD CARDにコピーすれば、rootとbootは勝手に作られてる。
だからfdiskコマンドでパーティションを作ってやる必要ないのでそのままコピー。

コピーするsd_cardの中身は下のファイル構成

$ tree sd_card
>>>
sd_card
├── boot
│   ├── BOOT.BIN
│   ├── dpu.xclbin
│   ├── image.ub
  ├── platform_desc.txt
     ├── dpu.xclbin
     ├── README.txt
     ├── ultra96v2_oob.hwh
│   └── system.dtb
└── root
    └── rootfs.tar.gz


sdカードに書きこみ用にsd.imgを作成

# sd.imgファイルを作成
truncate -s 8GiB sd.img
sudo losetup -f
>>>
/dev/loop17

sudo losetup /dev/loop17 sd.img
# sudo parted /dev/loop17 -s mklabel msdos -s mkpart primary fat32 0% 2GiB -s mkpart primary ext4 2GiB 100%
sudo parted /dev/loop17
###
mklabel msdos 
mkpart primary fat32 0% 2GiB
mkpart primary ext4 2GiB 100%
q
###

# 割り当ての確認
$ ls /dev/loop17*
>>>
/dev/loop17  /dev/loop17p1  /dev/loop17p2

sudo mkfs.vfat /dev/loop17p1
sudo mkfs.ext4 /dev/loop17p2

# マウント
mkdir -p ./mnt/boot ./mnt/root
sudo mount /dev/loop17p1 ./mnt/boot/
sudo mount /dev/loop17p2 ./mnt/root/

$ sudo cp sd_card/boot/* ./mnt/boot/
$ sudo tar -C ./mnt/root/ -xzvf sd_card/root/rootfs.tar.gz

$ # 追加で必要なデータは、 ./mnt/root/home/root 以下に置く
# sudo cp -r xilinx_vai_board_package ./mnt/root/home/root/
# sudo mkdir ./mnt/root/home/root/place
# sudo cp -r seg_test_images ./mnt/root/home/root/place/
# sudo mkdir ./mnt/root/home/root/place/output

sudo sync
sudo umount ./mnt/boot
sudo umount ./mnt/root
sudo losetup -d /dev/loop17

# sd.imgに格納されてるか容量をcheck
$ du -hs sd.img
>>>
2.0G	sd.img

あとはEtcherでsdカードに焼けばOK。


3.gtktermでultra96v2にログイン


VirtualBoxにUSBを認識させた。teratermubuntu版「gtkterm」を使った

Ultra96v2ボードは1をoffに2をOnにしてSDカードのモード(JTAGではなく)にしておく。

まずVirtualBoxにUSB(JTAG)を認識させる。
VirtualBox - 仮想マシンにUSBメモリを認識・マウント

# gtktermのインストール
$ sudo apt-get install gtkterm

# USBが認識されてるか確認
$ ls -l /dev/ttyUSB*
>>>
crw-rw---- 1 root dialout 188, 0  828 17:11 /dev/ttyUSB0
crw-rw---- 1 root dialout 188, 1  828 17:11 /dev/ttyUSB1

# ultra96v2ボードにアクセス(terminalで実行)
$ gtkterm -p /dev/ttyUSB1 -s 115200


参考サイト


How to format SD card for SD boot

fdiskでフォーマットする

VirtualBox の Ubuntu にHDDを追加する方法

Ultra96-v2でCNN推論エンジン(DPU)を動かすまで

PytorchのTransformerでテキストからの音声生成(TextToSpeech)をやってみた【機械学習】

今回はTransformerを改造して、文章から音声を生成してみた。

俗に言う、エンコーダ・デコーダ形式のモデル。
プロセスが長くなりそうなので、要点だけ備忘録もかねてまとめようと思う。


目次
1.Transformer-TextToSpeechとは?
2.テキスト前処理
3.TransformerとPostNetの学習
4.テキストから音声を作成してみる


1.transformer-TextToSpeechとは?

今回作ったtransformerでの音声生成は、Google が発表したTactron2を改造した。

tactron2のEncoderとDecoderをTransformerに置き換えて、waveGlowをpostnetに置き換えたモデル。

Tactron2はそもそもGoogleのこれまでの音声生成プロジェクトで作られた、WaveNetと初代Tacotronのネットワークを組み合わせたもので、詳しくはサイトを見て欲しい。

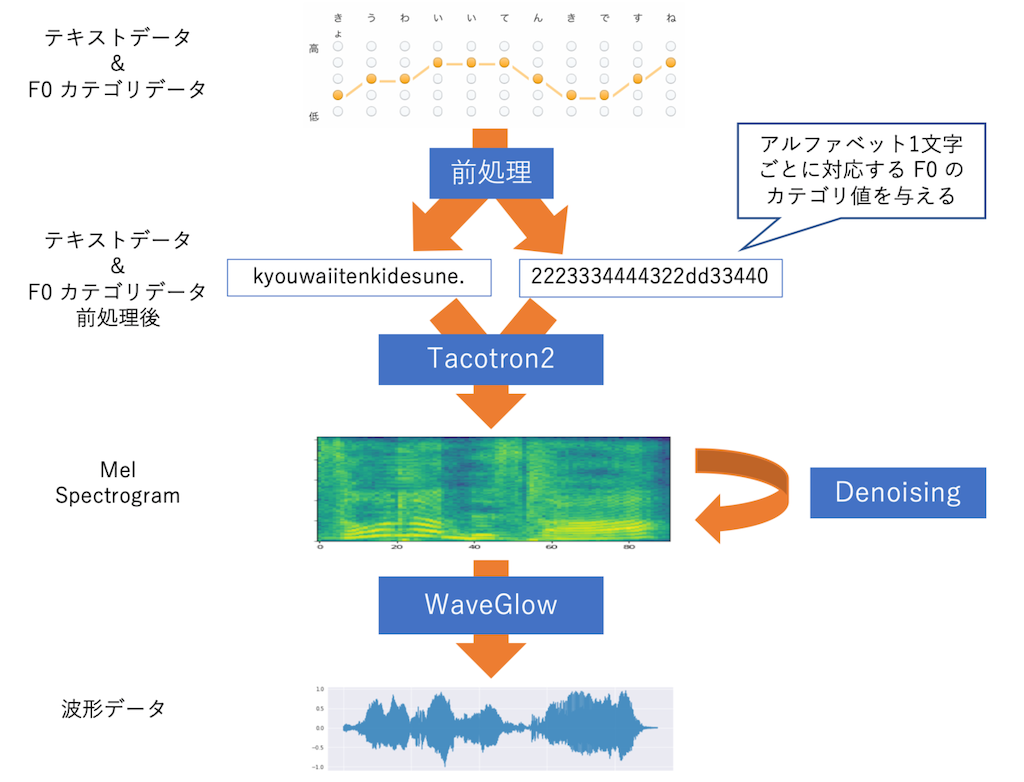
tacotron2での音声生成処理の流れ
f:id:trafalbad:20200630215005p:plain


今回作ったTransformerの音声生成処理の流れ
f:id:trafalbad:20200630215350j:plain


つまり、

・tacotron2 => Transformer
・waveGlow => PostNet
に置き換えた。

単純なAttentionモデルのseq2seqを使った場合より、4倍くらい速く、精度もbetter。

特にtransformerのattentionの部分が正確な音声の作成にかなり有効っぽい。


2.テキスト前処理

今回データセットは「The LJ Speech Dataset」を使った。

英語での音声を想定したデータセット


前処理では、日本語でもローマ字(英語のスペル)に変換する。
今回は英語対応なので、すべての文字を英語のスペルに変換。


試しにデータセットの一部分の、LJ050-0278のデータをのぞいてみる。

textデータ(csv)

LJ050-0278|the recommendations we have here suggested would greatly advance the security of the office without any impairment of our fundamental liberties.|the recommendations we have here suggested would greatly advance the security of the office without any impairment of our fundamental liberties.


音声データ

LJ050-0278.mag.npy
LJ050-0278.pt.npy
LJ050-0278.wav


まず訓練前にこのテキストデータを前処理した。


3.TransformerとPostNetの学習

まず、Transformerを学習させてから、最後にPostNetを学習して、音声合成する。

Transformerはスペクトログラム(人間の音高知覚に調整した特徴量:メル周波数)を出力。

PostNetは音声の波形データを出力する。

Pytorchなのでmodelをprint()してみた

Transformer

model = Transformer_model()
print(model)

>>>>>
Model(
(encoder): Encoder(
(pos_emb): Embedding(1024, 256)
(pos_dropout): Dropout(p=0.1, inplace=False)
(encoder_prenet): EncoderPrenet(
  (embed): Embedding(149, 512, padding_idx=0)
  (conv1): Conv(
    (conv): Conv1d(512, 256, kernel_size=(5,), stride=(1,), padding=(2,))

 ~略~

  (1): Attention(
    (key): Linear(
      (linear_layer): Linear(in_features=256, out_features=256, bias=False)
    )
    (value): Linear(
      (linear_layer): Linear(in_features=256, out_features=256, bias=False)
    )
    (query): Linear(
      (linear_layer): Linear(in_features=256, out_features=256, bias=False)

 ~略~

(decoder): MelDecoder(
(pos_emb): Embedding(1024, 256)
(pos_dropout): Dropout(p=0.1, inplace=False)
(decoder_prenet): Prenet(
  (layer): Sequential(
    (fc1): Linear(
      (linear_layer): Linear(in_features=80, out_features=512, bias=True)
    )

 ~略~

  (pre_batchnorm): BatchNorm1d(256, eps=1e-05, momentum=0.1, affine=True, track_running_stats=True)
  (dropout1): Dropout(p=0.1, inplace=False)
  (dropout_list): ModuleList(
    (0): Dropout(p=0.1, inplace=False)
    (1): Dropout(p=0.1, inplace=False)
    (2): Dropout(p=0.1, inplace=False)
  )
)
)
)

PostNet

model = PostNet_model() 
print(model)
>>>>>>

ModelPostNet(
(pre_projection): Conv(
(conv): Conv1d(80, 256, kernel_size=(1,), stride=(1,))
)
(cbhg): CBHG(
(convbank_list): ModuleList(
  (0): Conv1d(256, 256, kernel_size=(1,), stride=(1,))
  (1): Conv1d(256, 256, kernel_size=(2,), stride=(1,), padding=(1,))
  (2): Conv1d(256, 256, kernel_size=(3,), stride=(1,), padding=(1,))
  (3): Conv1d(256, 256, kernel_size=(4,), stride=(1,), padding=(2,))
  (4): Conv1d(256, 256, kernel_size=(5,), stride=(1,), padding=(2,))
  (5): Conv1d(256, 256, kernel_size=(6,), stride=(1,), padding=(3,))
  (6): Conv1d(256, 256, kernel_size=(7,), stride=(1,), padding=(3,))
  (7): Conv1d(256, 256, kernel_size=(8,), stride=(1,), padding=(4,))

  ~略~

  (linears): ModuleList(
    (0): Linear(
      (linear_layer): Linear(in_features=256, out_features=256, bias=True)
    )
    (1): Linear(
      (linear_layer): Linear(in_features=256, out_features=256, bias=True)
    )
    (2): Linear(
      (linear_layer): Linear(in_features=256, out_features=256, bias=True)
    )
    (3): Linear(
      (linear_layer): Linear(in_features=256, out_features=256, bias=True)
    )
  )
)
(gru): GRU(256, 128, num_layers=2, batch_first=True, bidirectional=True)
)
(post_projection): Conv(
(conv): Conv1d(256, 1025, kernel_size=(1,), stride=(1,))
)
)

コードだと分かりにくいのでモデルの全体像。
f:id:trafalbad:20200630215037p:plain


学習はfine-tuneで行った。
学習率のlearning rateは0.001がベストプラクティス。
あと学習が進むにつれてlearning rateも下がる調整もかなり重要っぽい

def adjust_learning_rate(optimizer, step_num, warmup_step=4000):
    lr = hp.lr * warmup_step**0.5 * min(step_num * warmup_step**-1.5, step_num**-0.5)
    for param_group in optimizer.param_groups:
        param_group['lr'] = lr


loss曲線はtctron2からの引用だけど、同等もさくはそれ以上に、かなりいい具合に減少。
f:id:trafalbad:20200630215049p:plain


でかいデータセットでやるとメモリエラーも起こるし、時間もとんでもなくかかるからfine-tuneがおすすめ。

最近はもうfine-tuneの方がかなり効率いいので、end-to-endの学習は余程のことがないとしないんじゃないかな?


4.テキストから音声を作成してみる

映画ホームアローンのハリーのセリフを作成してみる。

f:id:trafalbad:20200630215151j:plain


text1 = "I never made it to sixth grade"
text2 = "it dose not look like you are gonna"

周波数(fs)は低くするとドスのきいた声になり、高いと早口言葉みたいになる。

max_lenはtextの長さに比例するのでそれぞれちょうどいい具合に調整した。

def calculate_melsp(x, n_fft=1024, hop_length=128, n_mels=128):
    stft = np.abs(librosa.stft(x, n_fft=n_fft, hop_length=hop_length))**2
    log_stft = librosa.power_to_db(stft)
    melsp = librosa.feature.melspectrogram(S=log_stft, n_mels=n_mels)
    return melsp

# display wave in plots
def show_wave(x):
    plt.plot(x)
    plt.show()
    
    
# display wave in heatmap
def show_melsp(melsp, fs):
    librosa.display.specshow(melsp, sr=fs)
    plt.colorbar()
    plt.show()

text1 = "I never made it to sixth grade, kid."

max_len = 500
fs = 25000

text1 = "I never made it to sixth grade, kid."
wav = create_audio_wave(text1, max_len)

print(wav.shape)  # (137225,)
show_wave(wav)

melsp = calculate_melsp(wav, n_fft=fs, hop_length=max_len, n_mels=max_len)
print(melsp.shape) # (500, 275)

show_melsp(melsp, fs)

# 実際にjupyter上で音声が聞ける
ipd.Audio(wav, rate=fs)

この投稿をInstagramで見る

開発用 "I never made it to sixth grade"

Tatsuya Hagiwara(@gosei_creater)がシェアした投稿 -


text2 = "it dose not look like you are gonna"

text2 = "it dose not look like you are gonna"
wav = create_audio_wave(text2, max_len)

ipd.Audio(wav, rate=fs)

この投稿をInstagramで見る

開発用2 "it dose not look like you are gonna"

Tatsuya Hagiwara(@gosei_creater)がシェアした投稿 -


AttentionはNLPだけじゃなく、いろんな精度向上に役立つっぽい。

ガチの音声生成をしたのははじめてだった。分類系より、生成系は面白い。


参考サイト


GitHub - soobinseo/Transformer-TTS: A Pytorch Implementation of "Neural Speech Synthesis with Transformer Network"