アプリとサービスのすすめ

アプリやIT系のサービスを中心に書いていきます。たまに副業やビジネス関係の情報なども気ままにつづります

JetPack4.6.0とJetson NanoでPytorchとOnnxでyolov7の物体検出の環境設定(2023/02)

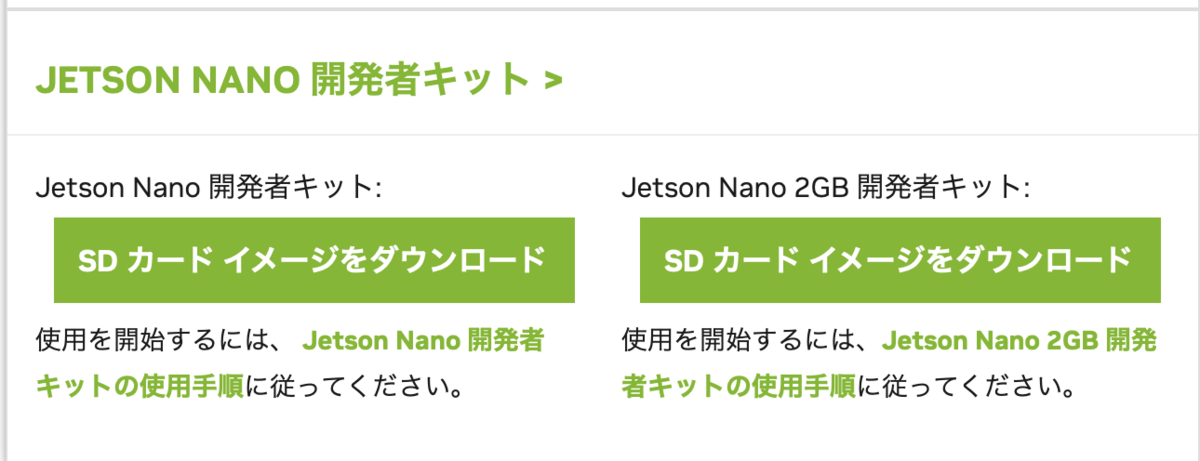
Jetson NanoでPytorchとOnnxで機械学習の物体検出とその環境設定をしたのでその備忘録。


ちなみに2023の2月でJetson NanoのJetPackの最新版は「4.6.0」

今回は「4.6.0」で環境構築してみた。


目次
1. versionと必要用語
2. 必要なライブラリのinstall
3. Pytorch(1.10.0)のインストール
4. OnnxRuntime(1.11.0)のインストール
5. yolov7で物体検出してみる

1. versionと必要用語

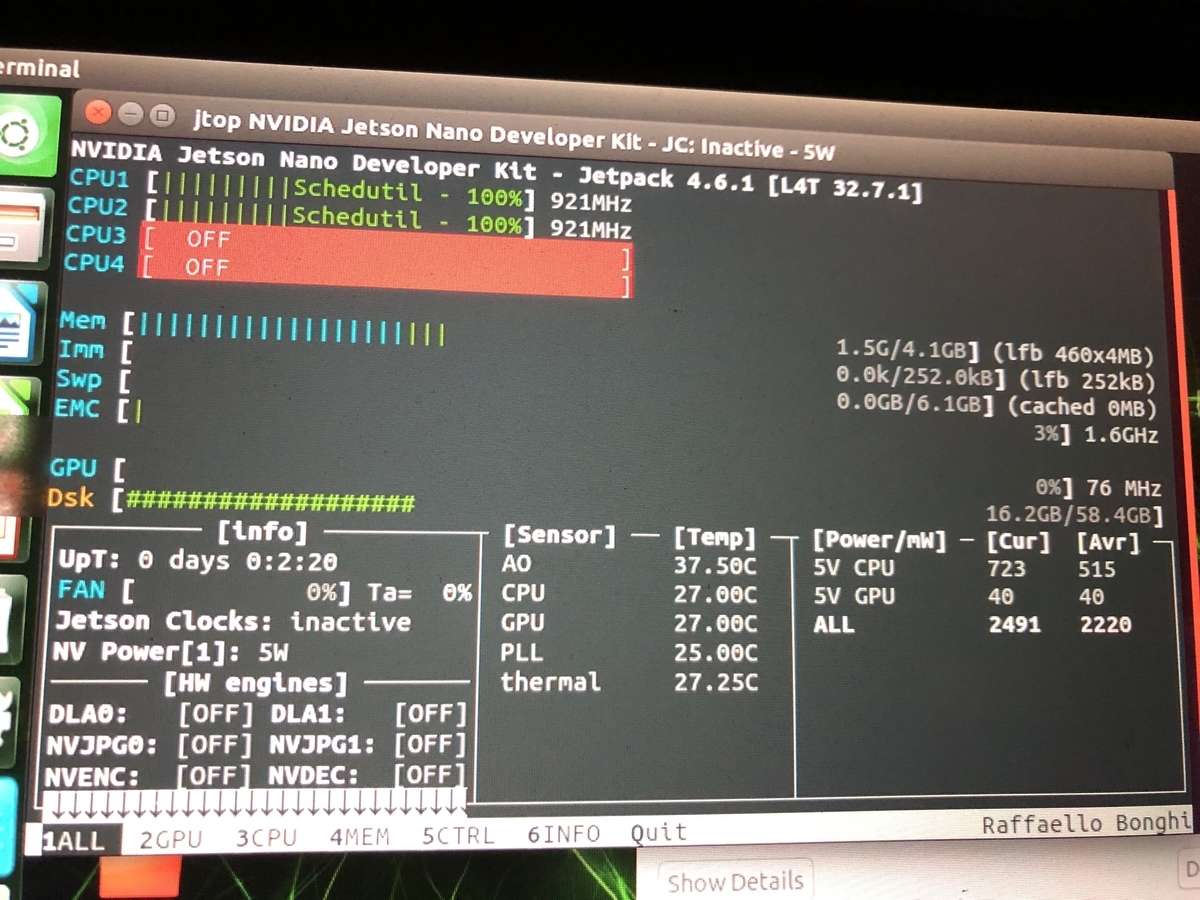
JetPack 4.6.0の各ライブラリバージョン
ubuntu 18.04
・Python3 3.6
・cuda 10.2
・cuDNN 8.2.1


Wheelファイルについて

Wheelファイル(.whl)はNVIDIAがすでにビルドしたものを提供しているファイルのこと。
downloadして使う。
それ以外は直接ソースからビルドしてinstallしたりする。


2. 必要なライブラリのinstall

JetPackをinstallしてから行う。

sudo apt update 
sudo apt install curl git unzip tree vim python3-pip
sudo apt-get install libopenblas-base libopenmpi-dev libomp-dev
pip3 install --upgrade pip
sudo reboot

3. Pytorch(1.10.0)のインストール

# pytoerch 1.10.0 from wheel 
# dependencies whee
apt-get install libopenblas-base libopenmpi-dev libomp-dev
pip3 install Cython
pip3 install numpy torch-1.10.0-cp36-cp36m-linux_aarch64.whl

torchvisionのインストール

# torchvision 0.11
sudo apt-get install libjpeg-dev zlib1g-dev
git clone --branch release/0.11 https://github.com/pytorch/vision torchvision
cd torchvision
sudo python3 setup.py install
pip3 install 'pillow<7'
# Versionチェック
$ torch.__version__
# 1.10.0
$ torchvision.__version__
# 0.11.0

Pytorch とtorchVisionのversionの対応表


Pytorchのバージョン対応するtorchVisionのバージョン
1.9.00.10.0
1.9.10.10.1
1.10.00.11.0
1.10.10.11.2
1.11.00.12.0
1.12.10.13.1


4. OnnxRuntime(1.11.0)のインストール

# onnxruntime 1.11.0
wget https://nvidia.box.com/shared/static/pmsqsiaw4pg9qrbeckcbymho6c01jj4z.whl -O onnxruntime_gpu-1.11.0-cp36-cp36m-linux_aarch64.whl
pip3 install onnxruntime_gpu-1.11.0-cp36-cp36m-linux_aarch64.whl
onnxruntime.__version__
'1.11.0'


5. yolov7で物体検出してみる

import cv2
import random
import math
import numpy as np
import onnxruntime

def letterbox(im, new_shape=(640, 640), color=(114, 114, 114), auto=True, scaleup=True, stride=32):
    # Resize and pad image while meeting stride-multiple constraints
    shape = im.shape[:2]  # current shape [height, width]
    if isinstance(new_shape, int):
        new_shape = (new_shape, new_shape)

    # Scale ratio (new / old)
    r = min(new_shape[0] / shape[0], new_shape[1] / shape[1])
    if not scaleup:  # only scale down, do not scale up (for better val mAP)
        r = min(r, 1.0)

    # Compute padding
    new_unpad = int(round(shape[1] * r)), int(round(shape[0] * r))
    dw, dh = new_shape[1] - new_unpad[0], new_shape[0] - new_unpad[1]  # wh padding

    if auto:  # minimum rectangle
        dw, dh = np.mod(dw, stride), np.mod(dh, stride)  # wh padding

    dw /= 2  # divide padding into 2 sides
    dh /= 2

    if shape[::-1] != new_unpad:  # resize
        im = cv2.resize(im, new_unpad, interpolation=cv2.INTER_LINEAR)
    top, bottom = int(round(dh - 0.1)), int(round(dh + 0.1))
    left, right = int(round(dw - 0.1)), int(round(dw + 0.1))
    im = cv2.copyMakeBorder(im, top, bottom, left, right, cv2.BORDER_CONSTANT, value=color)  # add border
    return im, r, (dw, dh)

def preprocess(img):
    # Scale input pixel values to 0 to 1
    image = img.transpose((2, 0, 1))
    image = np.expand_dims(image, 0)
    image = np.ascontiguousarray(image)
    return image.astype(np.float32) / 255

def onnx_inference(session, input_tensor):
    output_names = [i.name for i in session.get_outputs()]
    input_names = [i.name for i in session.get_inputs()]
    inp = {input_names[0]:input_tensor}
    outputs = session.run(output_names, inp)[0]
    return outputs

def post_process(outputs, ori_images, ratio, dwdh, conf_thres):
    for i, (batch_id, x0, y0, x1, y1, cls_id, score) in enumerate(outputs):
        image = ori_images[int(batch_id)]
        box = np.array([x0,y0,x1,y1])
        box -= np.array(dwdh*2)
        box /= ratio
        box = box.round().astype(np.int32).tolist()
        cls_id = int(cls_id)
        score = round(float(score),3)
        if score < conf_thres:
            continue
        name = names[cls_id]
        color = colors[name]
        name += ' '+str(score)
        cv2.rectangle(image, (box[0], box[1]), (box[2], box[3]), color, 2)
        cv2.putText(image, name, (box[0], box[1] - 2),cv2.FONT_HERSHEY_SIMPLEX,0.75,[225, 255, 255],thickness=2)
    return ori_images
def onnx_setup(opt):
    cuda = False if opt.cpu=='True' else True
    providers = ['CUDAExecutionProvider', 'CPUExecutionProvider'] if cuda else ['CPUExecutionProvider']
    session = onnxruntime.InferenceSession(opt.onnx_path, providers=providers)

    IN_IMAGE_H = session.get_inputs()[0].shape[2]
    IN_IMAGE_W = session.get_inputs()[0].shape[3]
    new_shape = (IN_IMAGE_W, IN_IMAGE_H)
    return session, new_shape

def inference_(frame, session, new_shape, conf_thres):
    ori_images = [frame.copy()]
    resized_image, ratio, dwdh = letterbox(frame, new_shape=new_shape, auto=False)
    input_tensor = preprocess(resized_image)
    outputs = onnx_inference(session, input_tensor)
    pred_output = post_process(outputs, ori_images, ratio, dwdh, conf_thres)
    return pred_output

session, new_shape = onnx_setup(opt)

_, left_image = left_camera.read()

Routput, Rx, Ry, Rrange = inference_(left_image, session, new_shape, opt.conf_ 
camera_images = Routput[0] 
# 中略 〜〜〜〜〜
cv2.imshow(window_title, camera_images)
〜〜〜〜


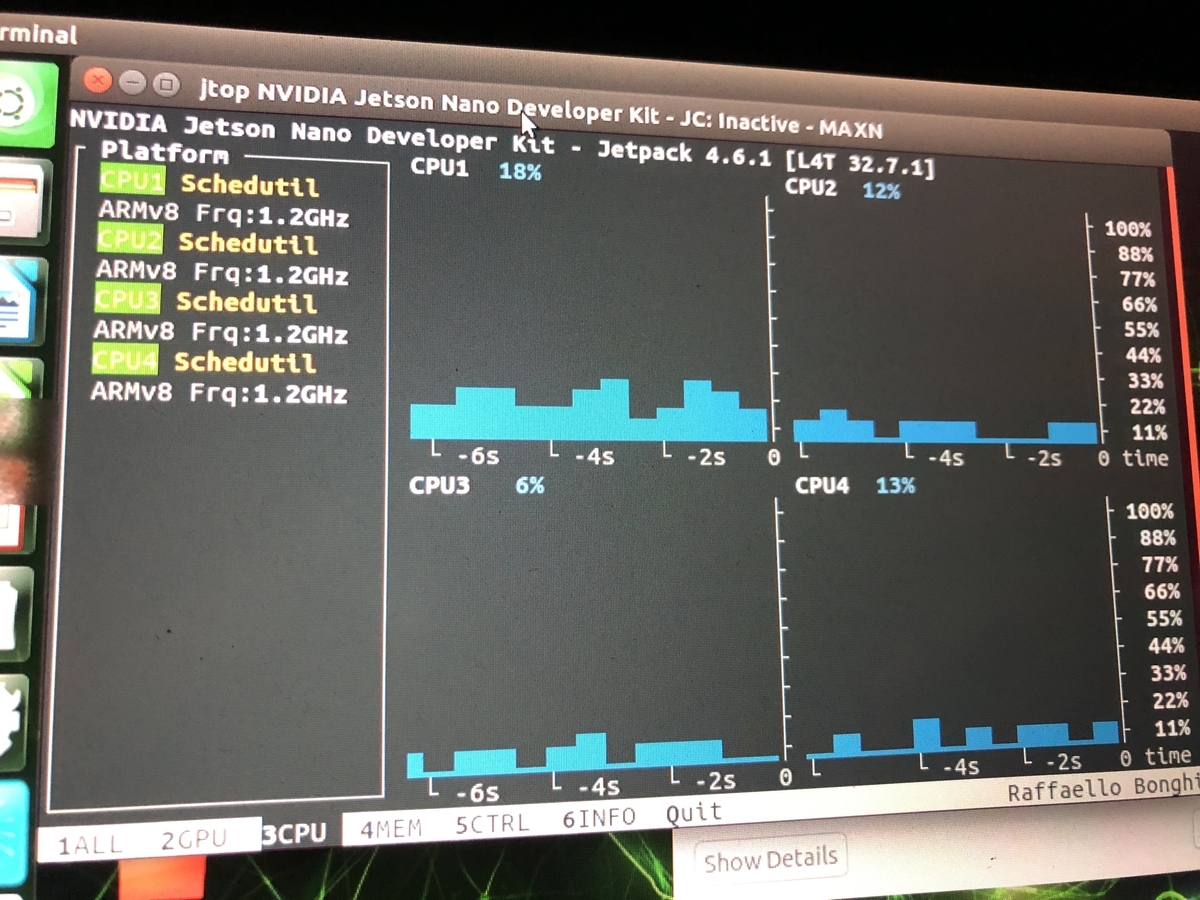
Jetson Nano & yolov7で物体検出できた。

参考サイト

IoT環境における知的情報処理技術 環境設定 (Jetson Nano編)
JetPack SDK 4.6 Release Page
Jetson Zoo

PCA9685とjetson nanoで複数のサーボモータを動かす

Jetson nano でPWMコントローラーのPCA9685を使ってサーボモータを複数動かすまでの備忘録。

PWMコントローラーを使えば、モータを16個同時に操作できるし、スクリプト側でマルチthreadingを使わなくて済むとかいいことばかりなので使ってみた。

あとPWMコントローラーは普通にサーボモータを使うより角度や、デューティ比を正確に設定できるので必須アイテム。

目次
1. Adafruit-PCA9685のインストール
2. PCA9685とjetson nanoの配線
3. 複数のサーボモータを実際に動かす


1. Adafruit-PCA9685のインストール

pip3 install Adafruit_PCA9685

このままだとエラーが出るのでI2C.pyを書き換え。

vi ~/.local/lib/python3.6/site-packages/Adafruit_GPIO/I2C.py


I2C.pyの以下を修正
・2行をコメントアウト
return Device(address, "1", i2c_interface, **kwargs)にする

def get_i2c_device(address, busnum=None, i2c_interface=None, **kwargs):
    """Return an I2C device for the specified address and on the specified bus.
    If busnum isn't specified, the default I2C bus for the platform will attempt
    to be detected.
    """
#    if busnum is None:
 #       busnum = get_default_bus()
    return Device(address, "1", i2c_interface, **kwargs)

下のように信号が表示されればOK。

$ sudo i2cdetect -y -r 1
>>>>

#     0  1  2  3  4  5  6  7  8  9  a  b  c  d  e  f
#00:          -- -- -- -- -- -- -- -- -- -- -- -- -- 
#10: -- -- -- -- -- -- -- -- -- -- -- -- -- -- -- -- 
#20: -- -- -- -- -- -- -- -- -- -- -- -- -- -- -- -- 
#30: -- -- -- -- -- -- -- -- -- -- -- -- -- -- -- -- 
#40: 40 -- -- -- -- -- -- -- -- -- -- -- -- -- -- -- 
#50: -- -- -- -- -- -- -- -- -- -- -- -- -- -- -- -- 
#60: -- -- -- -- -- -- -- -- -- -- -- -- -- -- -- -- 
#70: 70 -- -- -- -- -- -- --                         


2. PCA9685とjetson nanoの配線

PCA9685.                    Jetson Nano
------------------------------------
GND                  ->        GND
SCL                   ->        I2C(5 番)
SDA                   ->        I2C(3番)
VCC                   ->        3.3V
V+                      ->        5V


3. 複数のサーボモータを実際に動かす

simpletest.py

from __future__ import division
import time
import Adafruit_PCA9685

pwm = Adafruit_PCA9685.PCA9685()

# Configure min and max servo pulse lengths
servo_min = 102  # Min pulse length out of 4096
servo_max = 492  # Max pulse length out of 4096

# Helper function to make setting a servo pulse width simpler.
def set_servo_pulse(channel, pulse):
    pulse_length = 1000000    # 1,000,000 us per second
    pulse_length //= 60       # 60 Hz
    print('{0}us per period'.format(pulse_length))
    pulse_length //= 4096     # 12 bits of resolution
    print('{0}us per bit'.format(pulse_length))
    pulse *= 1000
    pulse //= pulse_length
    pwm.set_pwm(channel, 0, pulse)

# Set frequency to 60hz, good for servos.
pwm.set_pwm_freq(50)

print('Moving servo on channel 0, press Ctrl-C to quit...')
while True:
    # Move servo on channel O between extremes.
    pwm.set_pwm(15, 0, servo_min)
    time.sleep(1)
    pwm.set_pwm(14, 0, servo_max)
    time.sleep(1)
    pwm.set_pwm(15, 0, servo_max)
    time.sleep(1)
    pwm.set_pwm(14, 0, servo_min)
    time.sleep(1)


Tkinerを使ったversion

from __future__ import division
import time
import Adafruit_PCA9685

from tkinter import *

pwm = Adafruit_PCA9685.PCA9685()
pwm.set_pwm_freq(50)

class App:

    def __init__(self, master):
        frame = Frame(master)
        frame.pack()
        scale_pan = Scale(frame, label="pan", from_=0, to=180, tickinterval=90, orient=HORIZONTAL, command=self.update_pan)
        scale_pan.set(90)
        scale_pan.grid(row=0, column=0)
        scale_tilt = Scale(frame, label="tilt", from_=0, to=180, tickinterval=90, orient=VERTICAL, command=self.update_tilt)
        scale_tilt.set(90)
        scale_tilt.grid(row=0, column=1)

    def update_pan(self, angle):
        duty = int( float(angle) * 2.17 + 102 )
        pwm.set_pwm(14, 0, duty)
        time.sleep(0.1)

    def update_tilt(self, angle):
        duty = int( float(angle) * 2.17 + 102 )
        pwm.set_pwm(15, 0, duty)
        time.sleep(0.1)

root = Tk()
root.wm_title('Servo Control')
app = App(root)
root.geometry("220x120+0+0")
root.mainloop()

うまくいった。


参考サイト

Jetson nanoとPCA9685でサーボを動かそうとするときのI2Cエラー対処法!
jetson_nano_grove

Jetson Nano セットアップ備忘録 (Pytorch , onnxとか動かすまで)

Jetson nanoを使ったのでセットアップの備忘録。

nv-jetson-nano-sd-card-image-r32.3.1(JetPack 4.3)」のページのイメージをMicro SDカードに焼いた。(from qiitaの記事)


JetPacはtensorflowの都合でJetpack==4.3にした。

パーツ一式はこのサイト「Mac でJetson Nanoをセットアップ」を参考にした。

Jetso nanoセットアップのパーツ一式
Team microSDカード 64GB
HDMIケーブル
有線USBスリムキーボード
小型ディスプレイ HDMI
有線マウス
TP-Link 無線LAN子機
Jetson Nano AC/DC アダプタ
***自分はHDMIディスプレイの電源アダプタも必要だった。


目次
1.SDカードに書き込み
2.はじめにjetson nano起動 & apt upgrade
3.仮想環境作成
4.Pytorch のinstall
5.whlでTensorflowのインストール
6.jetson上でonnxでyolov4のリアルタイム推論してみる

1.SDカードに書き込み

Getting Started with Jetson Nano Developer Kit」通りにパーティションをいじる。

SDカードが刺さってない状態

# 何も表示されない。
$ diskutil list external | fgrep '/dev/disk' 

SDカード入れると

$ diskutil list external | fgrep '/dev/disk'
>>>>>
/dev/disk4 (external, physical):
/dev/disk5 (synthesized):


EtcherからSDカードは/dev/disk4らしいので、

$ sudo diskutil partitionDisk /dev/disk4 1 GPT "Free Space" "%noformat%" 100% 
>>>>
Unmounting disk
Creating the partition map
Waiting for partitions to activate
Finished partitioning on disk4

Etcherで書き込み。

書き込み完了。


2.はじめにjetson nano起動 & apt upgrade

sudo apt update
sudo apt upgrade
sudo apt dist-upgrade

3.仮想環境作成

sudo apt install python3-venv

仮想環境の例

python3 -m venv place
cd place
source bin/activate

# 抜けるとき
deactivate
python3 -m venv place 
cd place
source bin/activate

# dependencies
# sudo pip3 install wheel
sudo apt install gfortran libopenblas-base libopenmpi-dev libopenblas-dev libjpeg-dev zlib1g-dev libv4l-dev python3-pip
# pip update
sudo pip3 install -U pip

# sudo pip3 install jupyter notebook
sudo pip3 install cython numpy # scipy
sudo pip3 install pandas tqdm Pillow pybind11 scikit-learn
sudo pip3 install opencv-python

4.Pytorch のinstall

nvidiaのサイトから

pytorch version 1.4をdownload

wget https://nvidia.box.com/shared/static/ncgzus5o23uck9i5oth2n8n06k340l6k.whl -O torch-1.4.0-cp36-cp36m-linux_aarch64.whl

sudo pip3 install torch-1.4.0-cp36-cp36m-linux_aarch64.whl

# torchvision インストール
pip3 uninstall numpy
pip3 install numpy==1.19.4

git clone https://github.com/pytorch/vision torchvision
cd torchvision && git checkout v0.5.0 && export BUILD_VERSION=0.5.0
sudo python3 setup.py install


Version確認

$ python3
$ import torch
$ torch.__version__
>>>>>
'1.4.0'

Pytorch とtorchVisionのversionの対応表


Pytorchのバージョン対応するtorchVisionのバージョン
1.9.00.10.0
1.9.10.10.1
1.10.00.11.0
1.10.10.11.2
1.11.00.12.0
1.12.10.13.1


5.whlでTensorflowのインストール

whlでnvidiaのサイトからインストールする。

sudo apt-get install libjpeg8-dev hdf5-tools libhdf5-serial-dev libhdf5-dev zlib1g-dev zip

# Python package dependencies
sudo pip3 install bumpy grpcio absl-py py-cpuinfo psutil portpicker mock six requests gast h5py astor termcolor wrapt protobuf google-pasta keras_preprocessing keras_applications

# tensorflow install
sudo pip3 install https://developer.download.nvidia.com/compute/redist/jp/v42/tensorflow-gpu/tensorflow_gpu-1.13.1+nv19.5-cp36-cp36m-linux_aarch64.whl


tensorflowのversion確認

$ python3 
$ import tensorflow as tf
$ tf.__version__
>>>
1.13.1


6.jetson上でonnxでyolov4のリアルタイム推論してみる

onnxに変換したyolov4-tinyでリアルタイム推論してみる。

# onnx dependencies
sudo apt install libprotobuf-dev protobuf-compiler pybind11-dev libprotoc-dev

# onnx install
sudo pip3 install onnxruntime
sudo pip3 install onnxconverter-common==1.6.0
sudo pip3 install onnx==1.6.0

# 推論
$ python3 camera_estimate.py yolov4_tiny.onnx

jetson上での推論をモニターで写した動画。

画像サイズ小さくしたから、距離推定の値も小さくなってもうた。
tensorRTとかc++は機会があったら。


大相撲インフェルノ(趣味のカラクリ武器作り)

参考サイト

This guide provides instructions for installing TensorFlow for Jetson Platform.

【Jetson_nano】インストールからTensorflow,Chainer,そしてKeras環境構築出来たよ♬

【Jetson Nano】Jetson NanoにPyTorchをインストールしようとしてハマった話。

Jetson本格仕様セットアップTips part2

Jetson NanoのJetPack SDK Card imageをinstallした後の、本格的に使うためのセットアップのTipsのメモのpart2。

目次
1. GUI機能の無効化でメモリ消費量を抑える
2. 電源をACアダプターからmicroバッテリーに変換する


1. GUI機能の無効化でメモリ消費量を抑える

自動GUI表示機能を無効化して、メモリ消費量を減らす。

# GUIがONか確かめる
$ systemctl get-default
# graphical.target

# GUI時のメモリ使用量
$ free -m
#               total        used        free      shared  buff/cache   available
# Mem:           3964         808        2324          21         831        2980
# Swap:          6078           0        6078

# GUI機能を無効化
$ sudo systemctl set-default multi-user.target
# Removed /etc/systemd/system/default.target.
# Created symlink /etc/systemd/system/default.target → /lib/systemd/system/multi-user.target.

# 再起動して反映
$ sudo reboot
# GUIを無効時のメモリ使用量
$ free -m
#               total        used        free      shared  buff/cache   available
# Mem:           3964         617        2621          20         725        3174
# Swap:          6078           0        6078

# GUIに戻す時
$ sudo systemctl set-default graphical.target

メモリ使用量が200くらい減った。


2. 電源をACアダプターからmicroバッテリーに変換する

ジャンパーPINをとり外して、電源をMicroバッテリーに対応させる。
ACアダプターに戻すにはジャンパーPINをつければ戻る。


microバッテリーは専用のを使わなくても、スマホの携帯充電器(5V)とmicro-B とUSB-Aのケーブルがあれば携帯用microバッテリーができる。


jetson nanoが動いて、headlessと加えて、どこでも使えるようになった


参考

JetsonNanoの電源として使えるモバイルバッテリーについて

Jetson本格仕様セットアップTips part1【ハードウェア】

Jetson NanoのJetPack SDK Card imageをinstallした後の、本格的に使うためのセットアップのTipsのメモ

目次
1. JetPack SDK Card imageをdownload (JetPack=4.6.1)
2. Jetson Nano上での必要パッケージのupdate
3. スワップ領域の確保
4. パワーモードの切り替え(カスタムパワーモードの設定)
5. プロセッサー(CPU/GPU)の使用率を調べる


1. JetPack SDK Card imageをdownload (JetPack=4.6.1)

JetPack
JetPack Version =4.6.1

4GBは
・sd-blob-b01.img
2GBは
・sd-blob.img


2. Jetson Nano上での必要パッケージのupdate

$ sudo apt-gwt update 
# $ apt-get upgrade 
# 依存関係のないパッケージをunistall
#$ apt-get autoremove
$ sudo apt-get install curl git unzip tree vim python3-pip
$ pip3 install --upgrade pip

# python3 version
$ python3 -V
>>> 3.6.9

# opencv version check 
$ dpkg -l | grep libopencv
>>> 4.1.1.2

3. スワップ領域の確保

1. スワップが有効化どうか確認する

# スワップが有効化どうか確認
$ free -m
###               total        used        free      shared  buff/cache   available
### Mem:           3955        1748         900          61        1306        2092
### Swap:          1977           0        1977

# SWAP領域を構築するZRAMを調べる
$ swapon -s
### NAME       TYPE        SIZE USED PRIO
### /dev/zram0 partition 494.5M   0B    5
### /dev/zram1 partition 494.5M   0B    5
### /dev/zram2 partition 494.5M   0B    5
### /dev/zram3 partition 494.5M   0B    5

4つのCPUあるので4つのSWAP領域が存在するのがわかる。

2. SWAP領域を追加する

4GBのSWAP領域を設定する。count=4で設定する

# SWAP領域の追加
$ sudo dd if=/dev/zero of=/var/swapfile bs=1G count=4
### 4+0 records in
### 4+0 records out
### 4294967296 bytes (4.3 GB, 4.0GiB) copied, 128.347s, 33.5 MB/s

3. 「/var/swapfile」をSWAP領域として使う

# SWAP領域の初期化と権限追加
$ sudo mkswap /var/swapfile
>>>>
### mkswap: /var/swapfile: insecure permissions 0644, 0600 suggested.
### Setting up swapspace version 1, size = 3 GiB (3221221376 bytes)
### no label, UUID=b97b85f8-5576-4fbd-8886-7cfadeece0b7

$ sudo chmod 600 /var/swapfile

4. SWAP領域をマウントするように「/etc/fstab」のラストの1行を追加
以下を追加
/var/swapfile none swap swap 0 0

$ sudo vi /etc/fstab
>>>>

# /etc/fstab: static file system information.
#
# These are the filesystems that are always mounted on boot, you can
# override any of these by copying the appropriate line from this file into
# /etc/fstab and tweaking it as you see fit.  See fstab(5).
#
# <file system> <mount point>             <type>          <options>                               <dump> <pass>
/dev/root            /                     ext4           defaults                                     0 1
/var/swapfile        none                  swap           swap                                         0 0  


5. SWAP領域を使用可能にする

$ sudo swapon /var/swapfile
# 再起動
$ sudo reboot


6. SWAP領域が確保されているか確認

SWAP領域が設定されてるか確認したら「/var/swapfile」がSWAP領域として使用されているのがわかる。

優先度は-1。ZRAMを使い切らない限りSWAP領域は使用されない。

$ free -m
              total        used        free      shared  buff/cache   available
Mem:           3956        1112        2160          23         683        2683
Swap:          6074           0        6074
$ swapon -s
Filename				Type		Size	Used	Priority
/var/swapfile                          	file    	4194300	0	-1
/dev/zram0                             	partition	506380	0	5
/dev/zram1                             	partition	506380	0	5
/dev/zram2                             	partition	506380	0	5
/dev/zram3                             	partition	506380	0	5


4. パワーモードの切り替え(カスタムパワーモードの設定)

MAXN:最大パフォーマンス
5W:低消費電力

# MAXNに切り替え
$ sudo nvpmodel -m 0
# 5Wに切り替え
$ sudo nvpmodel -m 1

カスタムパワーモードの設定

# LOWの設定
$ sudo vi /etc/nvpmodel.conf

# LOWに切り替え
$ sudo nvpmodel -m 1
$ sudo nvpmodel -q
>>>>
# NVPM WARN: fan mode is not set!
# NV Power Mode: LOW
# 2
# MAXN is the NONE power model to release all constraints
< POWER_MODEL ID=0 NAME=MAXN >
CPU_ONLINE CORE_0 1
CPU_ONLINE CORE_1 1
CPU_ONLINE CORE_2 1
CPU_ONLINE CORE_3 1
CPU_A57 MIN_FREQ  0
CPU_A57 MAX_FREQ -1
GPU_POWER_CONTROL_ENABLE GPU_PWR_CNTL_EN on
GPU MIN_FREQ  0
GPU MAX_FREQ -1
GPU_POWER_CONTROL_DISABLE GPU_PWR_CNTL_DIS auto
EMC MAX_FREQ 0

< POWER_MODEL ID=1 NAME=5W >
CPU_ONLINE CORE_0 1
CPU_ONLINE CORE_1 1
CPU_ONLINE CORE_2 0
CPU_ONLINE CORE_3 0
CPU_A57 MIN_FREQ  0
CPU_A57 MAX_FREQ 918000
GPU_POWER_CONTROL_ENABLE GPU_PWR_CNTL_EN on
GPU MIN_FREQ 0
GPU MAX_FREQ 640000000
GPU_POWER_CONTROL_DISABLE GPU_PWR_CNTL_DIS auto
EMC MAX_FREQ 1600000000

< POWER_MODEL ID=2 NAME=LOW >
CPU_ONLINE CORE_0 1 # online CPU core is 1
CPU_ONLINE CORE_1 0 # off line CPU core is 0
CPU_ONLINE CORE_2 0
CPU_ONLINE CORE_3 0
CPU_A57 MIN_FREQ  0
CPU_A57 MAX_FREQ 102000 # CPU movement Hz range
GPU_POWER_CONTROL_ENABLE GPU_PWR_CNTL_EN on
GPU MIN_FREQ 0
GPU MAX_FREQ 640000000
GPU_POWER_CONTROL_DISABLE GPU_PWR_CNTL_DIS auto
EMC MAX_FREQ 1600000000 # Memory Movement Hz MAX
# mandatory section to configure the default mode
< PM_CONFIG DEFAULT=0 >


5. プロセッサー(CPU/GPU)の使用率を調べる

$ sudo -H pip3 install -U jetson-stats
$ sudo reboot
# 使用率を見る
$ jtop

MAXN(パワーモード)

5W(低電力モード)


参考

JetsonNanoの電源として使えるモバイルバッテリーについて

MacからJetson NanoにRDP接続する(Headless化)

Macからjetsonにssh接続できる環境は前の記事でできた。
trafalbad.hatenadiary.jp


けどいかんせん、Jetson Nano用のキーボード、マウス、ディスプレイをいちいち接続するのが面倒で邪魔だから、なんとかしたいということで、

コマンドライン操作だけできればいい
・他のデバイスにマイクロデバイス(PC)として付属させたい

という前提で、今度はRDP(Remote Desktop Protocol)で、Macからリモート接続してHeadless化してみた
VNC接続よりはるかに簡単なのでこっちの方がいい。


目次
1. jetson nanoにサーバーをinstall
2. Macにクライアントをinstallして、RDP接続でアクセス

1. jetson nanoにサーバーをinstall

まずJetson側でサーバー用のxrdpをinstallする。


Jetson側

# hostnameの変更 (parallels)
$ hostnamectl set-hostname <新しいホスト名> 
# ホスト名の確認
$ hostname
# Ubuntuのipアドレスを確認
$ ifconfig
>>>
## enp0s5: flags=4163<UP,BROADCAST,RUNNING,MULTICAST>  mtu 1500
## inet 10.xxx.xx.8  netmask 255.255.255.0  

# RDPサーバをインストール
$ sudo apt update

# xrdp単体だと落ちてしまうのでデスクトップ環境をxfceに変更
$ sudo apt install -y xfce4
$ echo xfce4-session > ~/.xsession

$ sudo apt install -y xrdp

/etc/xrdp/startwm.sh の最後の2行をコメントアウトして以下を追加
test -x /etc/X11/Xsession && exec /etc/X11/Xsession
exec /bin/sh /etc/X11/Xsession

以下を追加
startxfce4

startxfce4
#test -x /etc/X11/Xsession && exec /etc/X11/Xsession
#exec /bin/sh /etc/X11/Xsession
# 再起動する
$ sudo reboot

****必要かわからないけど落ちないようにした操作

$ vi /etc/systemd/journald.conf
#Storage=aotoのオプション設定を「#」を削除して以下に変更
Storage=persistent
# 反映
$ systemctl restart systemd-journald.service


2. Macにクライアントをinstallして、RDP接続でアクセス

Mac

Microsoft Remote Desktop for Mac」をdownload。

「Add PC」から以下の項目を入れてく。
・PC名/ip address:10.xxx.xx.8($ ifconfig)
・ユーザー名:$ hostnameで調べたやつ
・パスワード:Jetson側のパスワード


問題なければ接続できた。

xrdpがうまく起動してることも確認できた。

# xrdpがうまく起動してることが確認
$ systemctl status xrdp

あっさりとheadless化できた。VNC接続なんかしなくてもこれでいいと思う。
ただubuntu21.14以降は環境が変わってるのでこのやり方ではダメらしい。

参考

Jetson NanoでMacから手軽にリモート接続する方法
XRDP client crashing on loading screen for Jetson Nano
【全オプション解説】journaldログが削除されない設定とおススメ設定を解説

MacからJetson NanoにVNC接続する(headless化)

Macからjetsonにssh接続できる環境は前の記事でできた。
trafalbad.hatenadiary.jp


けどいかんせん、Jetson Nano用のキーボード、マウス、ディスプレイをいちいち接続するのが面倒で邪魔だから、なんとかしたいということで、

コマンドライン操作だけできればいい
・他のデバイスにマイクロデバイス(PC)として付属させたい

という前提で、リモートデスクトップがいらないVNC接続をJetson NanoとMac間でやってみた備忘録。

あとロボットとか、外部のデータを送るマイクロデバイスとして使うときにこの操作は大事


目次
1. MacからJetson NanoにVNC接続
2. Jetson NanoでVNC Serverをデーモンとして自動起動させる


1. MacからJetson NanoにVNC接続

Jetson Nano側

初めは設定のためにキーボード、マウス、デイスプレイが必要。

重要:まずJetson側でGUIでログイン時にパスワードを要求しないように設定。

# Ubuntuのipアドレスを確認
$ ifconfig
>>>
## enp0s5: flags=4163<UP,BROADCAST,RUNNING,MULTICAST>  mtu 1500
## inet 10.xxx.xx.8  netmask 255.255.255.0  
$ sudo apt update 
$ sudo apt install tigervnc-standalone-server tigervnc-scraping-server
# パスワード設定
$ vncpasswd
>>> 

# Password:

# Verify:

# TigerVNCを起動
# x0vncserver -display :1 -passwordfile ~/.vnc/passwd
$ x0vncserver -display :0 -passwordfile ~/.vnc/passwd

Mac

[command]+[スペース]でSpotlight検索で「画面共有」で開く
10.xxx.xx.8
パスワード:[jetsonのパスワード]

VNC接続を確認。


2. Jetson NanoでもVNC Serverをデーモンとして自動起動させる

VNCサーバを毎回手動で起動するのは面倒なので、システム起動時に自動的にVNCサーバが起動するようにする。

# systemdデーモンのサービス設定ファイルの作成
$ sudo vi /etc/systemd/system/x0vncserver.service


/etc/systemd/system/x0vncserver.service

・ユーザー名==> hagi
pwd ==> /home/hagi

[Unit]
Description=Remote desktop service (VNC)
After=syslog.target
After=network.target remote-fs.target nss-lookup.target
After=x11-common.service 
 
[Service]
Type=forking
User=hagi
Group=hagi
WorkingDirectory=/home/hagi
ExecStart=/bin/sh -c 'sleep 10 && /usr/bin/x0vncserver -display :0  -rfbport 5900 -passwordfile /home/hagi/.vnc/passwd &'
 
[Install]
WantedBy=multi-user.target
# 設定 & 起動確認
$ systemctl daemon-reload
$ sudo systemctl start x0vncserver.service
$ sudo systemctl status x0vncserver.service
>>>
# 正しく動いてると以下のように表示される
#● x0vncserver.service - Remote desktop service (VNC)
#   Loaded: loaded (/etc/systemd/system/x0vncserver.service; en
#   Active: active (running) since Mon 2023-02-06 19:39:33 JST;
#  Process: 4717 ExecStart=/bin/sh -c sleep 10 && /usr/bin/x0vn
# Main PID: 4791 (x0vncserver)
#    Tasks: 1 (limit: 4181)
#   CGroup: /system.slice/x0vncserver.service
#           └─4791 /usr/bin/x0vncserver -display :0 -rfbport 59

# 2月 06 19:39:33 jetson systemd[1]: Starting Remote desktop se
# 2月 06 19:39:33 jetson systemd[1]: Started Remote desktop ser
#lines 1-11
# サービスを有効化して再起動
$ sudo systemctl enable x0vncserver.service
>>>>
# Created symlink /etc/systemd/system/multi-user.target.wants/x0vncserver.service → /etc/systemd/system/x0vncserver.service.

$ sudo reboot yes
# 再起動後、ちゃんとサービスが起動しているか確認
$ systemctl list-units | grep vnc
>>>
# loaded active     running   Remote desktop service (VNC)  

# 停止
$ systemctl stop x0vncserver.service


もうこの時点でVNC接続できたので、キーボード、マウス、HDMIケーブルは外してもOK。

ここまできたら、キーボード、マウス、HDMIケーブルは不要で、MacからVNC接続できる。


1. Jetson Nano電源接続
2. Macの[command]+[スペース]でSpotlight検索で「画面共有」で開く
3. ipアドレスを入力
4. パスワードを入れて接続完了。


MacからVNC接続で、もう重いにキーボード、マウス、HDMIケーブル不要でJetson nanoに簡単接続できた。

キーボード、マウス、HDMIケーブル不要でMacから接続


重要
・パスワードなしの自動ログインに設置しておく
・displayが「0」でエラーになるなら使用済みの可能性もあるので「1」とかにしてみる

これでJetbotととかのロボットにJetsonを取り付けて動かせる。

参考

Jetson Nanoにリモートデスクトップ(VNC)環境を用意する