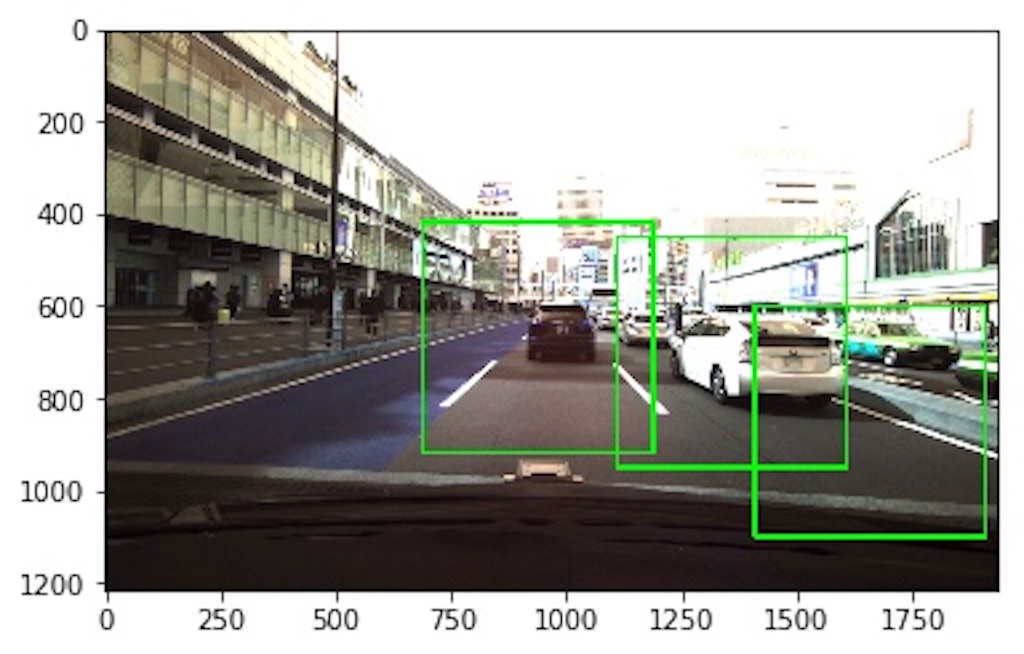
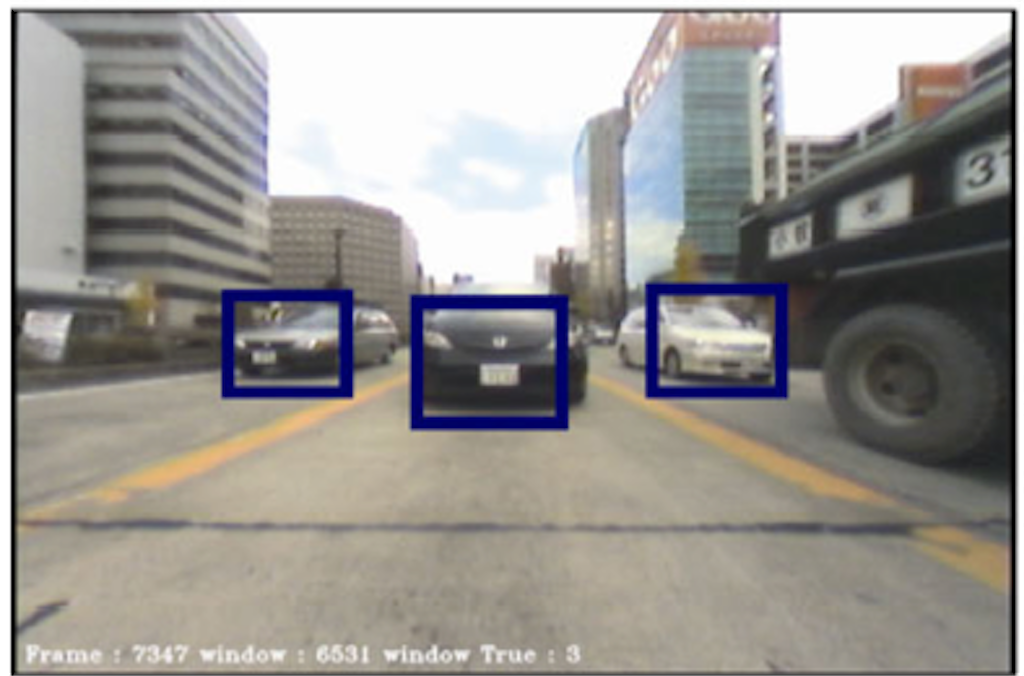
HOGとの組み合わせはSVMが有名だけど、今回はSVMじゃなく「HOG+AdaBoost」を使った。
どっちも精度は同じくらいだけど、AdaBoostの方が2回目以降精度が増すし、汎用性が高いのが特徴。
目次
・訓練データ・テストデータの収集
・前処理
・HOG+AdaBoostで物体検出
訓練データ・テストデータの収集
あらかじめバウンディングボックスの座標がアノテーションされた画像から、車とそれ以外のものをクロップして・negativeサンプル(車以外): 1500枚
を集めた。
車がちょうどよく入る大きさのにresize(300px)。Sliding windowサイズはリサイズしたサイズより大きめ(400~600px)にとった。
サンプルが多く、綺麗に物体が写ってるほど精度も良かった。
# trainと精度
print("HOG classifier AdaBoosting...")
ada = AdaBoostClassifier(n_estimators=100, random_state=0)
ada.fit(trainData, trainLabels)

print("HOG classifier Evaluating on test data ...")
predictions = ada.predict(testData)
print(classification_report(testLabels, predictions))

>>>>>>
"""
 Evaluating classifier on test data ...
              precision    recall  f1-score   support

           0       0.91      0.92      0.91       375
           1       0.90      0.88      0.89       301

    accuracy                           0.90       676
   macro avg       0.90      0.90      0.90       676
weighted avg       0.90      0.90      0.90       676
"""
前処理
基本的に前処理は以下の流れ2. testや本番で使う画像には前処理かけない(明るくしない)
明るくする方法はいくるかあるけどgammaを使ったコントラストは上手くいかない、しかも精度を下げる結果に。
def ganmma(img, gamma = 3.0):
    lookUpTable = np.zeros((256, 1), dtype = 'uint8')
    for i in range(256):
        lookUpTable[i][0] = 255 * pow(float(i) / 255, 1.0 / gamma)

    img_gamma = cv2.LUT(img, lookUpTable)
    return img_gamma
なので明るくするために、単純にRGBごとに明るくして、不純物を極力含めないようにした。
def equalize(img):
    for j in range(3):
        img[:, :, j] = cv2.equalizeHist(img[:, :, j])
    return img
HOG+AdaBoostで物体検出
HOG特徴量を使った物体検出の仕組みは、sliding windowを順番に画像内を走らせて、検出できた領域をバウンディングボックスで囲む。
def sliding_window(image, stepSize, windowSize):
    # slide a window across the image
    for y in range(0, image.shape[0], stepSize):
        for x in range(0, image.shape[1], stepSize):
            # yield the current window
            yield (x, y, image[y: y + windowSize[1], x:x + windowSize[0]])
検出結果
Sliding windowサイズを大きめ(400〜600px)にして、検出後にHOG特徴量用の300pxにリサイズした方が検出結果がよかった。
ベストパフォーマンスはWindow size = (500, 500) にResize size = (300, 300)
Window size = (500, 500) Resize size = (300, 300)のとき(ベストパフォーマンス)

Window size = (400, 400) Resize size = (300, 300)のとき

Window size = (600, 600) Resize size = (300, 300)のとき

物体検出以外の使い方
HOGでの物体検出は検出領域をバウンディングボックスで囲む以外にも、「エッジ検出」したり、「輪郭抽出」したりといろんな使い方ができる。
HOGでのsliding windowでの用途は多様なので、yolov3とかfaster-RCNNの物体検出ニューラルネットワークの「補助的な役割」として使うくらいがお利口な使い方かと思った。
バウンディングボックスで囲む部分のエッジ検出
def rgb_to_gray(src):
    b, g, r = src[:,:,0], src[:,:,1], src[:,:,2]
    return np.array(0.2989 * r + 0.5870 * g + 0.1140 * b, dtype='uint8')

def edge_detection(img):
    img_hist_eq = img.copy()
    for i in range(3):
        img_hist_eq[:, :, i] = cv2.equalizeHist(img_hist_eq[:, :, i])
    # img_gray = cv2.cvtColor(img_hist_eq, cv2.COLOR_BGR2GRAY)
    img_gray = rgb_to_gray(img_hist_eq)
    canny_img = cv2.Canny(img_gray, 50, 110)
    backtorgb = cv2.cvtColor(canny_img,cv2.COLOR_GRAY2RGB)
    return backtorgb

バウンディングボックスで囲む部分の輪郭抽出
def extract_contours(img):
    imgray = cv2.cvtColor(img,cv2.COLOR_BGR2GRAY)
    ret,thresh = cv2.threshold(imgray,127,255,0)
    image, contours, hierarchy = cv2.findContours(thresh,cv2.RETR_TREE,cv2.CHAIN_APPROX_SIMPLE)

    contour_img = cv2.drawContours(img, contours, -1, (0,255,0), 3)
    return contour_img

発展系 joint-HOG
単なるHOG特徴量だけを使うのではなく、ピクセルごとのHOG特徴量(の勾配)の組み合わせを使った「joint-HOG」もある。
joint-HOGの検出例

下のように、仕組みを真似して自分なりに組んでみたけど特に精度が良くなるわけではなかった。
from skimage.feature import hog
from skimage import data, exposure

# 輝度勾配を計算
def hog_gradient_img(image):
    fd, hog_image = hog(image, orientations=8, pixels_per_cell=(16, 16),
                        cells_per_block=(1, 1), visualize=True)

    hog_image_rescaled = exposure.rescale_intensity(hog_image, in_range=(0, 10))
    return hog_image_rescaled


# 勾配画像からjoint HOGを作成
def joint_hog(hog_img, threshold = 0.1):
    joint_fd = []
    fd = hog_img.flatten()
    for y in fd:
        for x in fd:
            if y-x > threshold:
                bit = 0
            else:
                bit = 1
            joint_fd.append(bit)
    return np.array(joint_fd)
組み方がよくないのは確かなので、正規のやり方でやればいい結果が出ることは間違いない。
HOGは決まったサイズの画像にしか適用できない上に、sliding windowを使うと計算コストもバカ高いので、物体検出はやっぱニューラルネットワーク一択だなと実感した。
ただニューラルネットワークのための画像前処理としては十分使えるのは間違いない。
joint-HOGは時間がなくてガチなのは組めなかったけど、qiitaとかで注目されてきたらやってみたい
参考サイト
【joint-HOG】
・第20回LSIデザインコンテスト・イン沖縄 設計仕様書 - 3-1
・python-hog(github)
・Joint HOG 特徴を用いた 2 段階 AdaBoost による車両検出
【HOG物体検出参考サイト】
・Opencvチュートリアル